Oh, the life of a student is rife with lack of money and an even stronger lack of time. That is, perhaps, why I haven't updated in awhile - I haven't had time to cook anything. Or post anything. But we misses it, yes precious.
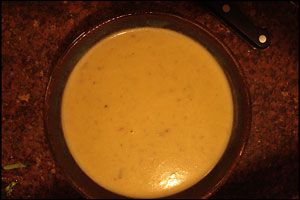
But there's always time for gallo pinto! This is the only dish I really took home with me from Costa Rica. It's breakfast done right. And really, it illustrates this blog perfectly. Rice and beans for every meal!
Now, I will not lay claim to its authenticity, but having spent a few months eating it every day for breakfast, I will say that it is prepared many different ways, and up to some interpretation by the cook. Other than the rice and beans, I think the most common ingredient in it is Lizano sauce, or "salsa lizano," which I never include for two reasons: 1) It's hard to find in Seattle (with the exception of a little Latino shop at Pike Place Market, but it's expensive there); and 2) I never really liked it much anyway. Some people put it on everything... like ketchup... but I'm not one of them. Bleh. Too sweet. Too strong.
The other common difference is that most places in Costa Rica will toss the beans in the pan before the rice, whereas I prefer to fry the rice first to get some texture and browning. But who's paying attention? I'm in the US now. Nobody here eats gallo pinto. Maybe I'll open up a food cart and sell it in little dixie cups. I think it would take off.
It's filling. It sits in your stomach and passes through your innards with the greatest of comfort and ease. And it tastes so good. Mmm, mm. Rice and beans.
If you're wondering, "gallo pinto" is pronounced, "guy'-o peen'-to," and means, "spotted rooster," in Spanish. In case you care.
Folks there usually serve it with fresh fruit (watermelon, canteloupe, mango, papaya, pineapple, grapes...), sometimes some kind of meat product (we don't need that here), sour cream (or mayonnaise, but why?), and often fried plantains. A plantain looks a lot like a banana, but it's bigger. A little more angular... and the end is pointier. Harder to peel, not that tasty raw. They grew free in the woods where I stayed in Costa Rica. Beautiful bunches of them. Cut off a bunch and hang it to ripen on the stalk. Plantains for everyone!
Once in awhile I find plantains at the store here and get them. Not too often, since they travel so far to get here, and they're rarely organic... I wish we could grow them fresh. That, and I just can't get them to taste the same as they do in Costa Rica. I fried them down there more than once, and they were lovely - sweet and lightly browned on the outside and moist on the inside. But here? Dry. Starchy. Chewy. Kind of like home fries that had been baked a little too long. Just not fun. I don't know if it's because they pick the plantains WAAAAAAAAAY before they should and they can never really develop, or if the ones they send up to the US are the rejects because we don't know the difference, or if the climate here is too dry... I don't know. I might never know.
But I made them anyway. They were OK. It doesn't really matter, if you have gallo pinto.
GALLO PINTO con PLÁTANOS FRITOS (guy'-o peen'-to con plah'-tah-noce free'-toce)
serves 2 generously
1 ripe (yellow) plantain
cooking oil
3/4 cup chopped onion
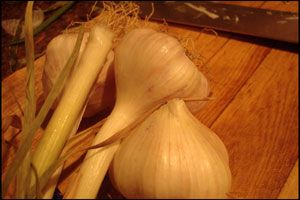
2 cloves garlic, pressed or minced
salt
1 1/2 tsp dried crumbled oregano
1 tsp cumin
1 cup cooked brown rice (or white rice if you want to forego a good source of fiber and protein - contact me if you want a tasty way to cook brown rice)
2/3 cup cooked black beans (or red beans)
1/2 cup chopped fresh cilantro leaves
~3 tbsp lime juice
1. Heat a well-seasoned cast-iron skillet over medium heat. A well-seasoned cast iron skillet will be virtually nonstick, provide unparalleled browning, and hold heat well. Meanwhile, peel your plantain and cut off any dark spots on the flesh. It should be delicately creamy pinkish on the inside. You might need a knife to peel it - those guys can be tough!
2. Oil up your pan. You should have enough oil to generously coat the bottom of the skillet, or your plantains might burn. A burnt plantain is a little bit like burnt anything else. It just tastes like carbon, and nobody likes that. Cut your plantain into little diagonal rounds (just slice down at an angle) about 1/8" thick (absolutely no thicker, and no thinner than 1/16"). Too thick, and it won't cook through. Too thin, and it will be impossible to handle. Place them around the skillet on one side and watch them smile up at you.

3. Use a fork to flip them when they're brown on one side. Just keep peeking at them until they're ready. They should look less brown than this:

4. When the second side is done, put them on a plate to wait for the gallo pinto. If your pan needs a little more oil, add some now, but it doesn't have to be much. Dump in the onions and brown them a little in the pan, stirring them with some kind of non-plastic utensil (cast iron, with its superior heating powers, will melt plastic into your food). I use wood. It's pleasant.

When the onions look like that, you can add the garlic. Work fast, because you don't want the garlic to burn. It will most likely do so if and when you turn your back. Also add a pinch of salt (how much depends on whether you cooked your rice with salt, and how much salt is in the bean liquid), your oregano and cumin, and stir quite well. You should smell it, and it should smell good.
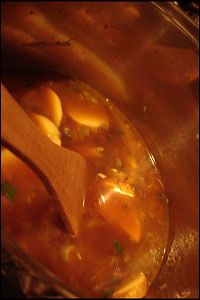
5. Add the rice. Mix it well with the onions and garlic, then spread it out to cover the pan bottom and leave it alone for a few minutes.If you keep messing with it, it will stick and make your pan difficult to clean.

You can take this time to chop your cilantro. Use more or less depending on how much you like it. I didn't like it at first, but now I'm addicted. Cilantro makes everything taste south-of-the-border.

6. Turn your rice after a couple of minutes. It should be browning a bit. Do this a few times to ensure even, light browning. When it's ready, it should look a little like this:

7. Add the beans. Spoon them in with a little liquid. Not too much. But some. You want to coat the rice so it's not hard on the teeth from the frying. Mix them in and leave it alone for a minute, to let the beans heat up. Turn it a time or two, but don't cook it very long or it will dry out the starchy bean liquid.

8. Take the pan off the heat and stir in the cilantro. Splash in some fresh lime juice (adjust to taste) and stir that in as well. Get it out of the pan and onto a plate as soon as possible, or the lime will degrade on the hot metal and just taste like something warm and sour and not fresh. Garnish with some more cilantro, and serve with your plantains and sour cream. ¡Buen provecho!

PROS: appetizing, filling, great source of protein and fiber, wonderful warm and savory way to start the day, deeeelicious!
CONS: plantains just aren't the same here in the USA
I should note that I don't ever measure anything in this recipe, I just sorta put down what I think I put in. So don't fret about measurements if you think it needs a little more of this or a little less of that. Taste it and see. That's the only way to make it to your liking! Also, I often put in some chopped up bell pepper with the onion. I didn't have it on hand, so I didn't put it in. It's more authentic, but honestly, I like it better without.
You can clean your cast iron pan by putting a little bit of cooking oil in it after all the food is out, scraping off anything that may have stuck with the utensil you were cooking with, and wiping the inside clean with a paper towel. It should look mildly shiny with no food bits. That's all - no water, no soap, no salt, no sand. Pretty easy.

 2 cups flour


 courtesy of Rancho Mastatal