28 November 2007

Carrot Cake


Every time someone has a birthday, I jump at the chance to bake a cake. I love cake. I love baking cake. I think it's because I love licking the mixing bowl afterward...

...but that's another story. My dad's birthday was yesterday, and I was thrilled at the opportunity to make another cake. I made it gluten-free, just because I felt confident enough with my experience to turn it out well. I secretly bought enough ingredients for two cakes in the instance that the gluten-free version was a flop.

But oh. Oh. This was no flop! Whoever says gluten-free baking is inferior obviously hasn't eaten this.

And again, I must credit Cook's Illustrated for the recipe on which my version is based. I know that when I need to bake something for the first time, I will always check to see if they have a recipe for it first. That way, if my adaptation doesn't turn out... I know that it's my fault and not the base recipe's. Oh, what a blessing America's Test Kitchen is. But I've changed this recipe enough to be considered different from the original. Well, duh.

CARROT CAKE
3/4 cup plus 2 tbsp sorghum flour
3/4 cup white rice flour
1/2 cup potato starch
1/4 cup soy flour
2 tbsp tapioca starch
1 1/2 tsp xanthan gum
2 1/2 tsp baking powder
1 1/4 tsp baking soda
1 1/4 tsp cinnamon
1/2 tsp nutmeg
1/8 tsp cloves
1/2 tsp salt
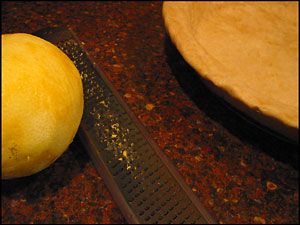
1 lb fresh carrots, peeled
1 cup golden (Sultana) raisins
1 can crushed pineapple, drained very well
1 1/2 cups sugar
1/2 cup packed brown sugar
4 large eggs
1 1/2 cups vegetable oil (I used sunflower)

12 oz neufchatel or cream cheese
8 tbsp (1 stick) unsalted butter, slightly softened but still cool
1 tbsp sour cream
3/4 tsp vanilla
2 cups powdered sugar
3/4 cup sliced almonds

1. Preheat oven to 350°F. Grease two 9"x2" round cake pans, and line with parchment paper or waxed paper. Grease the parchment as well.

2. Whisk the dry ingredients - flours, starches, xanthan gum, baking powder and soda, spices, and salt - thoroughly in a medium bowl.


3. Using your food processor, shred the carrots (make sure you shred them, not pulverize them). If you're ambitious and/or don't have a food processor - and I used to do this - you can grate them by hand. If you do this, you can probably do most of the rest of the steps in a mixing bowl rather than a food processor.

4. Add the shredded carrots and raisins to the dry ingredients, and wipe out your food processor. Add sugars and eggs to the food processor, and process with the metal blade until frothy and well-mixed.

5. Keep the processor running, and slowly drizzle the oil through the feed tube. Process until well-emulsified and light in color.

6. Transfer wet ingredients to a large bowl and stir in the crushed (drained) pineapple. Fold in the dry ingredients, along with carrots and raisins, until all flour is mixed in. But don't mix it longer than you have to. You'll kill the leavening.


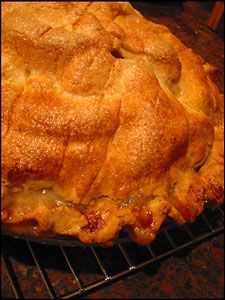
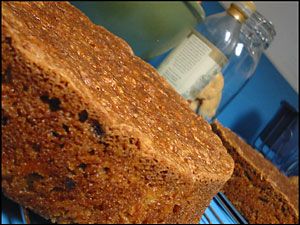
7. Pour batter into your prepared cake pans and stick on a middle oven rack. Bake for 40 minutes or until cake starts to pull away from edges of pan and an inserted toothpick comes out clean. And it's golden brown. Or poke the top of the cake with your finger. If it springs back, it's done.


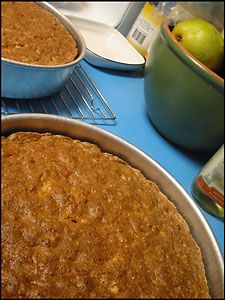
8. Cool on wire racks, in the pans, to room temperature before frosting. And let me tell you - you don't want to frost this cake warm. Disaster will ensue.


9. Clean out your food processor. This is a good time to lick the bowl, if you're into that sort of thing. I know I am. But for the sake of whomever's going to be eating your cake, please wash it after you lick it. And then dump in the cream cheese, butter, sour cream, and vanilla. Process until well-mixed. If it starts sticking to the sides, then you know what to do. Get out that rubber spatula.

10. Add powdered sugar and process some more until it's nice and smooth. Scrape it all out, put it in a bowl, and stick it in the fridge to chill for oh, 20 minutes or so.

11. Take your cakes out of their pans when they're cool, and put them on the wire racks directly. Face up, of course. When you're ready to decorate, transfer one cake round to whatever it is you like to decorate on. I used a cardboard round sitting on top of an inverted cake pan - it spins easily, and is slightly elevated.

12. Take your frosting out of the fridge, and if you want to reserve some for piping later (letters, little carrots, whatever), save 2 tbsp to 1/4 cup and set aside. Plop some frosting - 1/2 cup, maybe - on the cake and spread to the edges (a large offset spatula works wonders here). Carefully set the second cake on top, and repeat the process. Use the remaining frosting to frost the sides. Try not to get crumbs in the icing, because that looks kinda tacky.

13. Press handfuls of sliced almonds into the sides - you can tilt the cake for this - until the sides are covered all the way around. Put a few in the center of the cake, on the top. It looks cute. And if you want to pipe decorations, color your reserved frosting however you want (I use natural coloring with annatto for the orange letters). And pipe away. For a makeshift pastry bag, you can use either a plastic bag with the corner cut out, or waxed paper folded in a cone. That's what I did. And sit back and admire your cake. Then eat it. Because, let's face it, carrot cake is awesome.


PROS: moist, perfectly balanced spice, great ratio of cake:frosting, delicious but not too nutritious
CONS: frosting is a
little wet, and sweetness of cake is difficult to detect through sweetness of frosting (but trust me. it's minor.)

Maybe I should stop posting all my recipes and just write a durn tootin cookbook. I hear that's what all the cool kids are doing these days...

27 November 2007

Thanksgiving Stuffed Squash

Happy holidays, everyone.

And down in history goes my first Thanksgiving: at least, my first Thanksgiving making a significant contribution to the dinner table.

It was my year at my dad's this time. Aside from the small ham for the omnivores, the whole feast was vegetarian... and boy, it was good! At least, I think so. But hey, I'm a big fan of food. Especially when I can eat it.

Gracing our table (besides the ham) was many a good food. The appetizers consisted of cheese, my Grandma's deviled eggs, an olive/pickle/pepper tray, and Barb's stuffed mushrooms and cheese-pecan sandwich bites... I could make a meal of those alone. Easily. And when we sat down, we were greeted by the smells and sights of stuffed acorn squash, potatoes au gratin, harvest shepherd's pie with mashed yams, fresh green salad, and Grandma's legendary cranberry chutney that is, in my opinion, the highlight of every Thanksgiving. For dessert, pumpkin cheesecake and mince pie. Who could want a single thing more?

I debated which dish to blog about - I made the squash, shepherd's pie, and mince pie - and I finally settled on the squash. I'm particularly proud of it because I came up with the recipe. OK, no big deal, but I'm proud anyway. Probably because I was afraid it would taste bad. Or bland. Or just stupid. And it didn't :)

The shepherd's pie was very tasty. I got the recipe from the Whole Foods Cookbook - you can also find the recipe on the Whole Foods website. Instead of ground beef, it gets its protein and texture from crumbled tempeh. I chose "garden vegetable" tempeh instead of plain tempeh because... well, it can't hurt. It's a vegetable dish. This was my first experience with tempeh (at least, that I can remember) and wow. I found a new tofu substitute. I'm impressed! And it's gluten-free, to boot. Instead of mashed potatoes on top, this dish has these delicious orange yams and sliced almonds... oh boy. It tasted like yumm. The yams were seasoned by a mixture of butter, orange juice and zest, and brown rice syrup simmered into a viscous liquid. It gave it character. It tasted like Thanksgiving.

And mince pie? The recipe is from my book Baking Illustrated by the editors of Cook's Illustrated magazine. The first mincemeat mixture I simmered up was scorched black. 6 organic apples, 2 cups of apple cider, a stick of organic butter, a cup each of organic raisins and currants, an organic lemon and organic orange, a selection of organic spices and some amount I don't remember of organic dark brown sugar - all ruined. *facepalm*

But it was OK - mum came to the rescue, new ingredients were bought, apples were re-peeled and diced, and mincemeat was back on the stove in no time. This time, I stood there for three hours, stirring it every five minutes. As a result, the mincemeat was a little... well, resembling of apple butter, but it sure tasted good. And it wasn't scorched. Stick it in a gluten-free crust with a lattice top (don't even go there... no easy task, that), and voila. Easy as pie.

From this experience, I learned (as I have learned in the past) that the settings on an electric stove are not the same as those on a gas stove, and Cook's Illustrated writes for a gas stove. But I have electric. *sigh* Such is the life of a over-ambitious hungry person.

And my squash - oh, how proud I am. I wanted a gluten-free stuffing, so I thought hey! Rice. Wild rice is native to the states... perfect. And what goes with rice?

Beans!

Which brought me to this "Three Sisters" idea I keep running across that combines beans, squash, and corn. And I seized ahold of that like a jack russell terrier sizes a rope toy with a labrador at the other end, and hell if I was gonna let go...

Ahem.

To make a long story short, I chose Anasazi beans because of their relative close proximity to the Great Lakes area (home of wild rice) - within trading distance, anyway. And acorn squash, because it's so darn cute and easy to stuff. Sage to season, because it grows wild here in the US. And frozen corn, because... well, fresh isn't in season anymore, and canned has added salt. Ha.


ACORN SQUASH WITH WILD RICE STUFFING
1/2 cup dry Anasazi beans, picked over
1 tsp salt
2 cups vegetable broth
1 cup wild rice
4 medium acorn squash
2 tbsp butter, softened
1 cup chopped onion
1 cup frozen (or fresh) corn kernels, thawed
2 tbsp butter
1 tbsp finely minced fresh sage leaves
6 cloves (or one medium head) roasted garlic, mashed
Salt and freshly ground pepper to taste
2 tsp dry yellow mustard powder
2 tsp salt

1. To soak the beans, add beans to a heavy pot and cover with water by two inches. Bring to a boil over medium-high heat. Boil five minutes and remove from heat. Cover and let stand for one hour.


2. Drain the soaking liquid from the beans. Cover again with water by two inches. Bring to a boil, then reduce heat to low. Cover, with lid slightly ajar, and simmer gently for 35-40 minutes. When you can squish a bean with your fingers, add salt and continue to simmer until desired tenderness (about 10 minutes more). Remove from heat, drain, and smell them. Kinda smokey... kinda salty... kinda like bacon. Except better, because nobody had to die. And beanier.

3. Bring vegetable stock to a boil in a medium saucepan. Add rice. Return to a boil and turn heat down to low. Cover and simmer 40-45 minutes, or until rice is fully cooked (it may pop a little, but it should be a little toothsome and nutty still). Transfer to a separate bowl and fluff with a fork. Reserve.

4. Preheat oven to 400°F. Cut each acorn squash in half, from the stem down. Remove seeds and discard (or reserve to toast later, if you want). Prick cavities with a fork, and rub each cut side with butter to coat.

5. Place squash halves cut-side up in a large baking dish with 1 inch water. Roast for about 35 minutes, or until just fork-tender.

6. Remove squash from oven and rest until cool enough to handle.


7. Sauté onions in butter over medium heat 2-3 minutes. Add corn, drained beans, and sage, cooking an additional minute or two. Remove from heat.


8. Scoop flesh from the squash halves, leaving a 1/2-inch shell. Mix flesh with roasted garlic and season with salt and pepper. Gently fold into rice, bean, and corn mixture, carefully not smashing the beans.

9. Rub mustard powder and remaining salt into squash shells. Stuff with stuffing and return to oven in the same baking dish. Bake an additional 25 minutes or until squash is tender and stuffing is heated through.


PROS: very Thanksgivingy, hearty yet vegetarian, nutritious and delicious
CONS: could use some tweaking as far as ratios go, and cooking times, but I lurrved it anyway


So there we have it.

02 November 2007

Holiday Cut-Out Cookies


Just getting caught up here... I've made so much stuff and hardly had time to post. Seems a little bit ironic.

Anyway, these cookies turned out pretty well, given my previous experiences with gluten-free cookies. I used a recipe, too, from Land O'Lakes. But I made a few changes. Since I don't pre-mix a gluten-free flour blend, I just use specific amounts of each kind of flour.

These are cookies you should probably eat within a few days, because they will dry out quickly after that and are prone to crumbling into little pieces... but hey. They're delicious. If you like soft, sweet, frosted cut-out cookies, that is... and I know I do.

HOLIDAY CUT-OUT COOKIES
1 cup unsalted butter, softened
1 cup sugar
2 egg yolks
1 1/2 tsp vanilla
1 1/2 cups white rice flour
1/2 cup potato starch
1/4 cup tapioca starch
3/4 tsp xanthan gum
1/4 tsp salt

1. Combine flours, xanthan gum, and salt in a medium bowl or on a piece of waxed paper and set aside.

2. Cream butter and sugar in a large bowl at medium speed, scraping often (I ran out of butter so I used half butter, half non-hydrogenated shortening) until light and fluffy and beautiful. Add egg yolks and vanilla, and continue beating until well-mixed, scraping down sides of bowl as needed.

3. Reduce speed to low and add flour mix, beating until incorporated. Divide dough in half, flatten into 4-inch disks, wrap and refrigerate 1 hour.

4. Preheat oven to 350°F. Generously rice-flour a work surface (if you don't have enough, the cookies will stick). Roll out one disk of dough to 1/4-inch thickness.


Using 2 1/2-inch cookie cutters of your choice, cut out pieces of dough and transfer them to an ungreased cookie sheet (add sprinkles now if you want). Place them at least 1 inch apart. This is where I goofed, and the cookies I put too close together started kissing in the oven. Sigh.


5. Bake 8-12 minutes or until edges are lightly browned (this took me 16-17 minutes in an accurate oven). Let rest 2 minutes on cookie sheets, then transfer with a metal spatula onto cooling racks. Cool completely before frosting.

6. I'd tell you what the frosting is made of... but I didn't write it down. Heavy cream, shortening, and powdered sugar... for the pumpkins I added some pumpkin puree, cinnamon, ginger, nutmeg and cloves, and for the chocolate I added melted bittersweet chocolate... But the ratios? Heck if I know. Anyway, pick a nice frosting recipe that you like (butter really is better for this, but I ran out). Frost those cookies. Decorate away. Buy one of those tubs of frosting if you really want to sacrifice all your hard work only to use canned frosting. They're your cookies... No pressure :)


PROS: so soft... and they actually hold their shape in the oven! As long as they're rolled thin enough, anyway. GREAT with frosting. If you hand them out, you'll have no trouble finishing off a batch in a couple of days.
CONS: A bit crumbly... and difficult to brown. The shape kinda gets a little muddled, but you can still tell what it is, especially if you use something like a pumpkin or a Christmas tree. Not so good for little details, though.


I made pumpkins (with pumpkin frosting), ghosts (with vanilla frosting), bats, and cats (with chocolate frosting). Sense a theme here? :)

I'll probably make a few changes next time. Like use Cook's Illustrated's "reverse creaming" method they recommend for holiday cut-out cookies. Definitely use all butter instead of half-shortening. Use a real recipe for frosting... like the vanilla and chocolate buttercream recipes from Vegan Cupcakes Take Over the World. Put them further apart on the baking sheet.

I'm so silly...

01 November 2007

Apple Pie


Wow, was this a hit. Deeeelicious. :D Not really my recipes, though... I used the Cook's Illustrated recipe for the filling (making one slight modification for gluten-freedom), and scaled up (and slightly modified) a recipe from Gluten-Free Girl for the crust. It turned out well. Really well. Aromatic and appley, and the crust resembled a wheat crust in all ways. YAY!

APPLE PIE
For the crust (mostly courtesy of Gluten-Free Girl):
1 cup plus 2 tbsp white rice flour
1/2 cup plus 2 tbsp potato starch
1/2 cup sorghum flour
1/4 cup sweet rice flour
3 tsp sugar
1/4 tsp salt
1 tsp cinnamon
8 tbsp butter, chilled
4 tbsp non-hydrogenated shortening, chilled
1 large egg
2 tbsp apple cider vinegar
1/4 - 1/3 cup ice water (or enough to make the dough just stick together)

For the pie filling (mostly courtesy Cook's Illustrated):
1 1/2 lb Granny Smith apples (about 3)
2 lbs ripe McIntosh apples (about 4)
1 tbsp juice and 1 tsp zest from 1 lemon
3/4 cup sugar
2 tbsp sweet rice flour
1/4 tsp freshly grated (or ground) nutmeg
1/4 tsp cinnamon
1/8 tsp allspice
1/4 tsp salt
1 egg white, lightly beaten
1 tbsp sugar

Crust:
1. In a large bowl, whisk together the flours, sugar, salt, and cinnamon. Cut butter and shortening into dry ingredients using a fork, pastry cutter, or food processor. Crumble together until butter is the size of large peas (or lima beans, even).

2. Make a well in the center of the dry ingredients. Add egg and vinegar, and incorporate gently. If using a fork, stir from the center outward.

3. Slowly add ice water, 2 tbsp at a time, into the crust mixture, stirring or processing until it begins to stick together. As soon as it forms a cohesive dough, stop adding water.

4. Divide the dough in two. Compress each into 4-inch disks and refrigerate in parchment paper overnight.

Pie Filling:
1. Take one half of your dough out of the fridge and set on the counter. Let it rest for twenty minutes while you prepare the pie. Place a rimmed baking sheet on the bottom rack in your oven, and preheat it to 500°F.

2. Peel and core your apples. Quarter them and cut each quarter into 1/4-inch slices (if they are too thick or thin, they will cook unevenly). Toss apples in a large bowl with the lemon juice and zest. If you have a microplane grater, use it. It makes zest like magic.

3. Take your second disk of dough out to rest for 20 minutes. Roll out your first disk to a 12-inch circle between two sheets of parchment. You may have to keep flipping it over, because the bottom side tends to get a little wrinkled. Carefully peel off the top layer (make sure there are no wrinkles, as this will make it difficult to get off cleanly). Center an upside-down 9" glass pie plate over the dough, and quickly invert. Use the parchment to help you press the dough into the corner of the pan, and peel off the parchment. Do any quick patchwork you need to before moving on.


4. In a medium bowl, combine sugar, flour, spices, and salt. Toss with the apples. Dump it all (including the juices) into the pie pan - don't be alarmed, it will make a HUGE heap - and arrange so that the pile is as compact and rounded as possible.

5. Roll out the second piece of dough to a 12-inch circle between parchment - same as before. Peel off the top and ever so carefully invert it on the giant mound of apples. Tuck the overhang from the top dough underneath the overhang from the bottom dough so that it sticks out a bit from the rim, and flute the edges however you like. If you don't know how, then google it. Not too hard!

6. Cut 4 slits in the top of the pie - if the dough is super soft, freeze it for a few minutes (no longer than 10, though, or the glass plate may break when it enters the oven). Brush the beaten egg white all over the top crust and sprinkle with sugar.

7. Place the pie on the baking sheet in the oven. Lower the temperature to 425°F and bake for 25 minutes (or until the crust is a nice golden color. Rotate it 180°, turn the temperature down once more to 375°F, and continue baking for another 30-35 minutes. The juices should be really bubbly and the crust a deep golden brown. Put pie on a cooling rack and cool to room temperature. If you CAN'T WAIT, just eat a piece. But it will be hot and it will fall apart. But sometimes that's not so bad.


PROS: Very fragrant, sweet and tart and spiced at the same time. The texture is wonderful - the Macs fall apart when they cook, and the Grannies stay al dente - the perfect combination. Go CI! It tastes of autumn and good times. Crust bakes up just like a standard wheat crust.
CONS: Crust is difficult to handle when rolling and transferring. Not *quite* as flaky as some (though nobody will complain), but with some tweaking I'm sure it could be.