31 January 2008

Two-Bean Enchiladas


My favorite part about cooking as a poor student is making wonderful, family-size dishes and freezing them in individual portions to eat later. It saves time. It saves money. It's homemade. I only really cook about once a week. I'd cook more if I had the time, and the money for ingredients, but right now I don't. So I eat a lot of beans. And rice.

Ahem. I wanted to make enchiladas. I don't know why, I just did. So I poked around and came up with a recipe that I thought would be good. I made it tonight. It made me want to ride a horse on the beach. Or whatever they do in Mexico.

Probably not that.

TWO-BEAN ENCHILADAS
Cooking oil
1 large onion, chopped
3 fresh jalapeƱos, seeded and chopped (do your mucous membranes a favor and wear gloves while handling the peppers)
3-4 cloves garlic, pressed
3 tbsp powdered ancho chili
1 tbsp cumin
1 tbsp oregano (crumbled, not ground)
2 tsp sugar
1/2 tsp salt
28 oz can fire-roasted diced tomatoes (get Muir Glen... they are GOOD)
1 1/2 cups cooked black beans, drained
1 cup cooked Anasazi or pinto beans, drained
1 cup fresh (or thawed frozen) corn kernels
1/2 cup chopped fresh cilantro leaves
1 cup shredded Monterey Jack cheese, packed
Salt to taste
12 corn tortillas
2/3 cup shredded sharp cheddar cheese
1/3 cup shredded Monterey Jack cheese

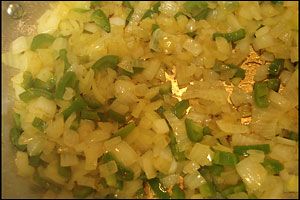
1. Heat oil in a large skillet over medium-high heat. When shimmering, add onions and jalapeƱos, and cook until onions begin to brown. This should take 3-4 minutes.


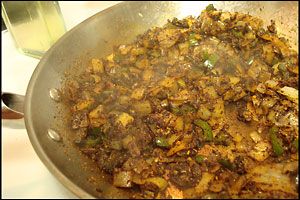
2. Add garlic, spices, sugar and salt, and continue to cook until fragrant, stirring constantly for about 1 minute. Don't burn it.


3. Stir in diced tomatoes and simmer about 3 minutes. Remove from heat. Cool to room temperature or a little above.


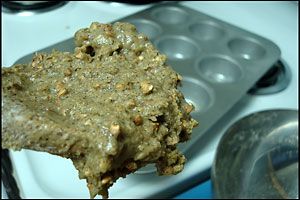
4. Meanwhile, preheat the oven to 400°F. In a food processor or blender, process the mixture until smooth but chunky. Kind of like a fat baby. Transfer 1 cup sauce to a medium bowl, and toss with the beans, corn, cilantro, and 1 cup Jack cheese. Season bean mixture with salt and reserve the rest of the sauce.


5. Cover a baking sheet with aluminum foil. Drizzle about 2 tbsp oil into a pie pan or similar sized dish and briefly coat both sides of each tortilla. Use more oil if you need to. Spread them out on the baking sheet, overlapping as little as possible. Cover with another layer of foil and bake in the oven for 4 minutes or until pliable and soft.


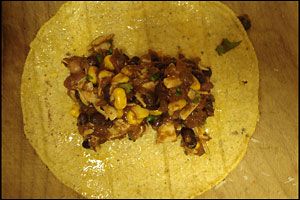
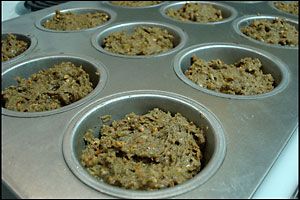
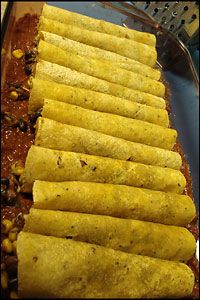
6. Spread 3/4 cup sauce in the bottom of a 13x9-inch baking dish. Spoon 1/3 cup bean mixture into the center of a tortilla, roll up, and place in baking dish seam-side down. Repeat with remaining tortillas, lining them side-by-side. You may have to smoosh them up against one another, but don't worry. They're social. If you end up with a little extra filling, just stick it in that 13th tortilla that sometimes finds its way into the the 12-pack, and eat it. Right now.


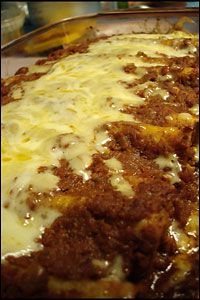
7. Pour remaining sauce over enchiladas, spreading it to coat the tortillas completely. If you miss a spot, it will get all hard and impossibly chewy, which is a bummer. Combine cheddar and remaining Jack cheese, and sprinkle over the top of the enchiladas (either to cover, or down the center in a line).

8. Cover baking dish with foil, leaving one corner loose for steam escape. Bake in the lower half of the oven for 25 minutes or until cheese is melted and sauce is bubbling.


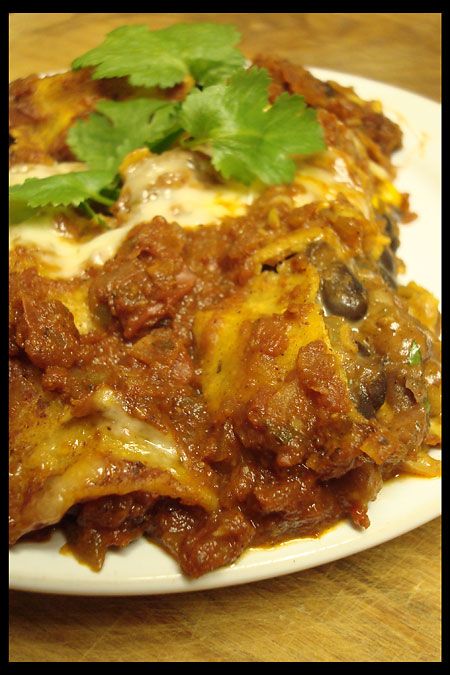
9. Garnish with cilantro and serve piping hot with sour cream, guacamole, and lime wedges. Because I'm cheap and poor, I had neither avocados to make guacamole, or limes. But believe me when I say it would have been killer.


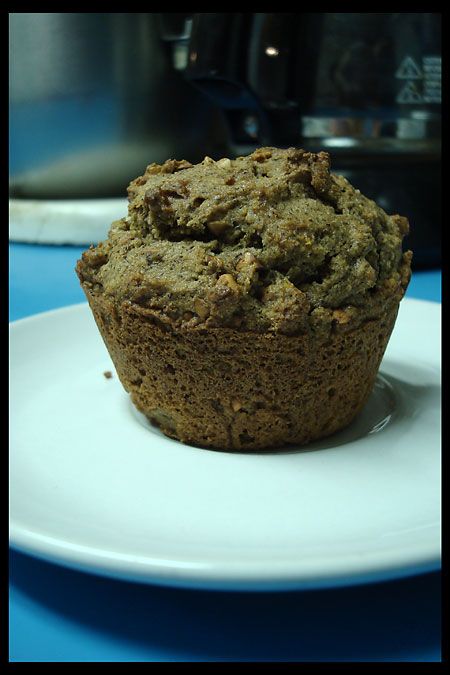
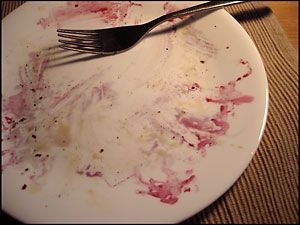
PROS: warm and gooey, proteiny, filling and low cholesterol
CONS: are you kidding me?!


This dish could easily be made vegan by omitting the cheese and dressing it with some sort of vegan cream sauce. And avocados. Please, don't skimp on the avocados.

23 January 2008

Buckwheat Bran Muffins


These muffins are like those sensuous big women with the low, smoky voices and a wink for you if you're lucky.

I have really developed a taste for buckwheat! I have buckwheat hot cereal for breakfast on my coffee days, I keep experimenting with buckwheat pancakes and waffles, and I've been making these muffins... they're quite tasty, really.

Originally I was going for a maple-flavored muffin, so I used maple syrup for sweetener. The maple didn't really stand out in the finished muffin, but I liked it anyway. I didn't want to bother adding something like maple extract that not many people have just lying around or are likely to ever use again. But I kept the maple syrup, because it adds a certain sultry va-va-voom. I also wanted a breakfast-type muffin (you know, fiber and protein and all that), hence the rice bran and buckwheat flour and brown rice flour, nuts and kasha and the like. Voila... it worked out.

These muffins, like most muffins, are pretty versatile. By that, I mean you can add things if you want. Nuts and chopped fruit (diced apple or pear might be good), seeds and such... go for it. Let me know how it is.

BUCKWHEAT BRAN MUFFINS
2/3 cup buckwheat flour
1/3 cup brown rice flour
1/4 cup potato starch
2 tbsp tapioca starch
2 tbsp soy flour
1/2 tsp xanthan gum
1 1/4 tsp baking powder
1/2 tsp baking soda
1 1/2 tsp cinnamon
1/2 tsp ginger
3/4 tsp salt
Grated zest from 1 medium orange
6 tbsp unsalted butter, melted and cooled
3/4 cup maple syrup, room temperature
2 large eggs
2 1/2 tsp vanilla extract
3/4 cup buttermilk
1/4 cup sour cream
1 cup rice bran
3/4 cup kasha
3/4 cup sliced almonds, crushed lightly


1. Preheat oven to 375°F and prepare sixteen muffin cups by lining or greasing. In a medium bowl, sift together flours, starches, xanthan gum, baking powder, soda, cinnamon, and salt. Add zest and whisk to combine. Set aside.

2. Beat eggs until frothy in a large bowl. Drizzle in melted butter, mixing well to emulsify. Add maple syrup and vanilla and stir to combine.


3. In a smaller bowl or liquid measure, whisk the buttermilk and sour cream together until no longer lumpy. Add to the bowl with the maple syrup and mix well.

4. Add flour mixture, folding gently until barely mixed but still lumpy. Fold in rice bran, kasha, and almonds until no streaks of flour remain and ingredients are moistened, but do not overmix.


5. Fill cups 3/4 full with batter, and smooth the tops with a spatula as best you can. Taste some.


6. Bake on the lower-middle rack for 23-25 minutes, or until they turn deliciously brown around the edges and just begin to pull away from the sides of the pan (if you're using liners, just use the toothpick method). Cool in pan 5 minutes, then remove to eat warm or cool or whatever. Toast them later, whatever.


PROS: warm and husky, exotically spiced yet delicate earthy flavor, delicious crunchy bits, not overly sweet
CONS: a little dense (is that a con?), flavor is mild

16 January 2008

Pasta e Fagioli


You know, I get a certain satisfaction out of trying something new. Food-wise, anyway. For the longest time I couldn't really stand to eat pasta without some kind of tomatoes or tomato sauce... but I'm expanding my horizons. Slowly. I still can't eat it with just plain olive oil. Too... pasty.

But I like pasta, and I like beans, so I thought I'd try this one out. Apparently it's an Italian classic... but not being Italian, or a foodie, I wouldn't know. Hits the spot on an icy January evening, though.

I got this recipe from the Joy of Cooking - 75th Anniversary Edition, but I made a few modifications to suit my diet. This is the version I made.

PASTA E FAGIOLI
1/2 lb dry cannellini beans
2 tbsp extra-virgin olive oil
1 onion, chopped
1 carrot, chopped
1 celery rib, chopped
(2 tbsp minced parsley - didn't have this, but it would have been awfully pretty)
3 garlic cloves, pressed
2 cups vegetable broth or stock, or more as needed
1 cup gluten-free quinoa-corn elbow macaroni
Salt
Freshly ground black pepper
1/4 cup grated Pecorino Romano cheese, or more as needed

1. Rinse beans and pick over for shriveled or broken beans and little pebbles. My dad always used to bite into really hard things in his food at dinnertime and then frown and try to figure out what it was. I wonder if they were pebbles.


2. Cover with an inch of water and let soak for up to 8 hours. It's supposed to improve digestibility for those with bean-sensitive guts. My gut is quite accustomed to beans and it makes no difference, so I just soaked them for three hours to see what would happen. They just got wrinkly.


3. Discard soaking water and cover again with an inch of water. Bring to a full boil, then reduce heat to medium-low or low, partially cover, and let simmer for an hour and a half. Test them after about 70 minutes for doneness (ie: you can mash them easily and they're not crunchy). Drain and let cool.


4. Heat oil in a stockpot over medium or medium-high heat. When it shimmers, add onion, carrot, celery, and parsley (if you're using it). I wish I had parsley :-(

5. Cook, stirring, for 5 minutes or until onion is golden-brown. Well. My onion never turned golden brown, even after 15 minutes. So when it started to get soft I just proceeded. Sigh.


6. Add garlic and cook for one more minute. Stir and add beans, mashing lightly and stirring to incorporate. It should look all soft and mashy. Yum.


7. After about a minute, pour in the broth and increase heat to high. Bring just to a simmer, then turn heat to medium-low. Partially cover, and let cook for five minutes.

8. Add macaroni and salt to taste, and stir lightly to incorporate. Simmer for an additional 15 minutes, or until the macaroni is al dente (cooked through, but gives some resistance to the teeth). Add about a cup more broth, or however much you need to get the consistency you want.

9. Lighly stir in black pepper and cheese, and serve with a little more cheese on top. Oh, it would look so much prettier with parsley. But you know what? It tasted good anyway.


PROS: Warm, chunky, thick, healthy, filling
CONS: very yellow... and a little bland


I apologize for not updating very often. I have a very busy schedule. I'm going to try to get in at least one blog per week though, at least for the quarter. I've penciled it in :-)

Of course, I am not sure if anybody is reading this because nobody comments. Fortunately, my plight is an easy one for you to remedy. So go ahead... make my day.

07 January 2008

New Look...

Well, I've finally ditched the template and made my own layout. I hope it works for everyone. Let me know if something doesn't show up right...

02 January 2008

Buckwheat-Corn Pancakes, part II


I've been working on this recipe for the past few months and I'm pretty happy with it so far. Better than the first version, certainly. The only catch is that I don't ever seem to have buttermilk on hand when I'm making it, so I've been using various combination of sour cream, milk, and/or lemon juice instead. I think buttermilk would be better. But I don't know until someone tries it and tells me.

These substantial, down-on-the-farm pancakes develop a sweet, crispy exterior while maintaining a moist and fluffy interior. The molasses adds a layer of earthy sweetness that is well-balanced by the more delicate flavor of honey.

BUCKWHEAT-CORN PANCAKES (part II)
2/3 cup buckwheat flour
1/4 cup corn flour
2 tbsp cornmeal
1 tsp baking powder
1/2 tsp baking soda
1/2 tsp salt
1 large egg, separated
1 cup buttermilk
2 tbsp butter
2 tbsp honey
1 tbsp full-flavored molasses (not blackstrap)
1/2 cup blueberries, fresh corn kernels, or other topping/filling of your choice


1. Whisk or sift together the dry ingredients (flours, leavening and salt) in a large bowl. It's helpful to sift if you have clumpy baking powder, because then, you know... it gets distributed and all. Just a thought.

2. Whisk egg white with buttermilk in a 2-cup liquid measure and bring to room temperature by partially submerging in a bowl of warm water and stirring periodically. If you have cold ingredients, it will coagulate the melted butter, which sucks a lot. You don't want clumps of butter here. It's not a pie crust, you know.

3. Reserve yolk in a small bowl while melting butter in a small saucepan or double boiler. Add honey as butter is nearly melted. Slowly drizzle melted butter and honey over the yolk, whisking constantly to avoid cooking the yolk. Stir in the molasses.

4. Add yolk mixture to buttermilk and whisk to combine well. Pour into large bowl with dry ingredients, and whisk until most of the flour is moistened but it's still a little lumpy. If you over-mix it, the bubbles created by the baking soda and powder will collapse and die like the fragile little creatures they are. Then you'll get really flat, dense pancakes. So be gentle.


5. Let batter rest for a few minutes while you preheat a heavy skillet over medium heat. I love cast iron for pancakes, it creates an unbeatable crust. Stainless doesn't really cut it, and I never recommend cooking in a nonstick pan, but that's just me. Use what you have.


6. Test the heat of your skillet by adding a pat of butter. If it foams but does not readily brown, the skillet is the proper temperature. If it browns quickly, it's too hot. If it slowly melts, it's not hot enough. Adjust! When it's just right, ladle or scrape some batter (it will be nice and thiiiick) onto the hot, buttered skillet. Spread it out some, or you'll get a lump rather than a pancake. Sprinkle your blueberries or corn on top. Whatever you want, really.


7. After the edges start to set and large bubbles appear in the middle of the batter, it's ready for flipping. This is fun. Flip it now. But try not to mess it up. Because half-cooked pancakes are very sensitive to this sort of activity and are prone to folding up on themselves, adhering to the sloped sides of your skillet (rather than the more desirable flat surface), or missing the pan altogether. This is not good.

8. Cook until bottom is crispy and brown, and then set aside on a rack to cool or keep warm in a 200°F oven while you cook the other pancakes. Add butter to the skillet before cooking each pancake, or they'll stick and won't get as crusty and beautiful. Don't stack them until they're ready to eat, or they'll get all soggy. Ew. Serve with butter, maple syrup, extra blueberries, or whatever you have that you think goes well with buckwheat pancakes.


PROS: sooo fluffy and delicious. Crispy on the outside and soft on the inside. Hearty yet light.
CONS: batter is so thick it can be difficult to work with. I don't really care, though.


PS: I got a new camera for Christmas! Woohoo! This is my first blog using my new Sony Cybershot DSC-W80. YAY!