28 October 2010

Black Bean Tacos


There are so many different kinds of tacos. One could dedicate an entire blog to tacos alone.

But I have many other things I'd like to cook, so I'll just settle for this post. Maybe in the future, I'll do another post about tacos. Salmon tacos. Tofajita tacos (I made that up, and I like it).

In these tacos, as I am wont to do, I used black beans - as opposed to, say, pinto beans or red beans. I have this thing where I feel like the darker a food is, the more nutrient-rich it is. It's not entirely true, of course, but I like to think it. In that light, black beans are the best thing ever.

So I made up these tacos, and I don't know the first thing about authenticity when it comes to Latin American food (or any food, for that matter), but that's not all that important to me. What's more important, is that it's nutritious and delicious, and preferably colorful. And that, these are. There are a few things I'd change - namely the fact that black beans are merely an equal component of the entire dish, and not featured - but I'll get to that at the end.

I do have to say one thing, though, and if you remember nothing else, remember this. Avocados are not optional on this taco.

I swear up and down I don't say that simply because I love avocados and think you should too (although, I do), but they provide a coolness, neutrality, and velvety lushness that nothing else can provide. They contrast the sharpnesses and strong flavors in the rest of the taco. They're completely necessary. Get over your "texture thing" and start experiencing a whole new world of food.


BLACK BEAN TACOS

red bell pepper
ear of corn
corn tortillas
shredded lettuce (whatever you have on hand)
shredded cabbage (purple or green)
thinly sliced onion
cooked and seasoned black beans
goat cheese, crumbled
sliced avocado
lime juice
fresh cilantro
sour cream or lime crème fraîche
Tabasco sauce
pinch of salt


1. If you don't have a grill, and you want "grilled" vegetables, sometimes sticking them right under the broiler will get the job done. In my case, I did the aforementioned treatment to an ear of corn and a red pepper. If you want lots of leftover "grilled" vegetables, just put lots of them in there. First of all, you want to put them on a cookie sheet.


Turn on the broiler and put the cookie sheet on the top rack so the vegetables are as close as they can get to the heating element without touching it (this might also be good if you lightly oil the corn first, but I haven't tried it). Leave them in there awhile, but make sure you watch to see when they are charring. Use tongs (or whatever you have) to turn them as they char, so you can char all the sides. Don't be alarmed if you hear popping and sizzling.

2. While your vegetables are broiling, cut up some of your other ingredients. I did my lettuce, cabbage, and onion during this time - it won't suffer if it sits out, cut, for awhile. The avocado, on the other hand, you should save until last.


Make sure to keep an eye on the oven during this time. If one vegetable gets done faster, take it out. In my case, that was the pepper.


You'll see that it got all wrinkly. This means the skin has started to separate from the flesh, which is ideal when you cook a pepper (it gets tough and curly and you need to peel it). Let it cool for a few minutes (10, maybe), and peel the pepper. During the cooling time, steam should form in the pepper that separates the skin further and makes it easier to peel.

Next came my corn, and it looked good.


Obviously, I like a little carbon on my food.

3. Cut the stem off the fat end of the corn cob when it cools, sit it upright and slice off the kernels. Just keep turning the cob and slicing off the kernels from the pointy end to the fat end. Mmmm!


4. Here's where it gets kind of blurry. You need to heat up your tortillas, but there are lots of ways to do this, and all of them are a little bit temperamental. The best way that I've found is to dip them briefly in water (however many you're going to use), stack them up, and wrap them tightly in foil that has a light coating of oil on the inside. Then you heat them, either in a warm toaster oven, or normal oven if it's on for something else (don't heat it up just for tortillas, though), or in a hot pan, covered. Heat them until the foil puffs a little. The goal here is to get the tortillas to soften and not be really dry.

5. Lay your warmed, softened tortillas on a plate, and pile stuff on them. (If you want to make them easier to pick up, stick their sides together so it's like that scene in Forrest Gump where Bubba and Forrest are sleeping outside in the rain and they lean their backs up against one another so they don't have their heads in the mud.) I started with lettuce and cabbage, followed by onion, and then spooned some delicious black beans (they should be warm, bordering on hot) on that, and crumbled a good amount of goat cheese over it. I lined it with broiled corn and red pepper, topped it with sliced avocado (onto which I sprinkled some lime juice) and cilantro, and drizzled on some lime crème fraîche (you can substitute a small amount of sour cream - I only used lime crème fraîche because I still had some). I then doobled on some Tabasco, and sprinkled some sea salt over the whole thing. It's all a matter of taste how much you use; if you find it lacking, put more on.


So... that's pretty much how I make most tacos, the only variations being in the ingredients.

In these tacos, I might leave out the lettuce and cabbage altogether. I don't think it added anything. I would use a little more black bean, and a little less pepper and corn.

The rest, I do believe, is lovely.

21 October 2010

Roasted Applesauce


I started out the week thinking I was going to be blogging about rice and beans again. Plain, old rice and beans. See blog name. Funds are low, spirits high, yada yada. I enjoy it. But then I went to a farmer's market on the Arizona State University campus in Tempe, and given a golden opportunity. One too good to pass up.

Free locally-grown blemished organic apples.

Like, FREE. So I took 5 pounds.


I believe that slightly wrinkled, a little old, somewhat banged-up apples make the best sauce. I can only hope that I prove to be as useful when I'm slightly wrinkled, a little old, and somewhat banged up.

They were a mixed variety, all grown in Willcox, AZ. As they were unmarked, I don't know exactly what they were - but it looked to me as though they were selections from their golden delicious, red delicious, and gala apples. Before you cry, "why, red delicious?? How awful!" I feel compelled to tell you that these red delicious apples in no way resemble the grown-in-Washington red delicious abomination of an apple for which my home state is unfortunately famous. They were small and round and stripy. Not tall and knobby, overly shiny and the color of ostrich meat.

One more thing, before I get to making the sauce. I must forewarn you that if you do not have a food mill and you do not wish for skins to remain in your applesauce, you are in for a workout when it comes time to strain the sauce. Don't worry, it makes your applesauce (and your triumphant victory) taste all the sweeter.

"Mightn't I just peel the apples first?" you ask naïvely. "No, good applewife (or appleman)," I tell you, "you may not." For the apple skins provide unparalleled color and flavor to your sauce as they cook, not to mention the pectin that thickens it and gives it body. If you're in it to take the easy way out, go to the 7-11 and buy a jar of lamesauce commercially-prepared applesauce, which gets all the color it needs from food coloring and all the flavor it needs from the ambiguous "natural flavors."

OK, I lied - one more thing. This was my grand experiment with making applesauce in the oven. That is, to say, roasting it. I must say, I approve of the result. One might say this is actually the recipe for...

Wait for it...

Awesomesauce? Yeah, I said it.


ROASTED APPLESAUCE

5lbs mixed apples, or McIntosh (they'd probably make the best sauce), or whatever
3 tbsp lemon juice (about 1 1/2 lemon's worth)
1/4 cup plus 1 tbsp brown sugar
5 cinnamon sticks
10 whole cloves
Pinch of sea salt
3/4 cup water


1. Preheat the oven to 375°F and start with your large amount of blemished (or simply just nice and ripe) apples. Bruises are fine. Mold and rot are not so fine. As for worms, that's your discretion. Cut out whatever you're not comfortable with. I should mention that there's sort of a formula to this recipe - for every pound of apples, you should have about 1 1/2 tsp lemon juice (I rounded up a little), 1 tbsp brown sugar, 1 cinnamon stick, two whole cloves, and 2 tbsp water (I rounded up a little). It's not an exact science, just a guideline.

So, you have your apples. Core them and cut them in eighths, like I did making the apple crumble, only do not skin them. Just leave them in eighths. For larger apples, you can cut them in 12 slices. It doesn't really matter. The bigger they are, the longer they need to cook, and vice versa. Try and make them somewhat even, though.


2. If you can find a bowl large enough for your 5lbs of cut up apples with a little room, great! I could not, however, and ended up simply with a very full bowl.


It makes it interesting, anyway, as you then have to toss the apples with the lemon juice and brown sugar. Somehow I managed.


3. Pile them all in a largish-sized roasting pan. If you don't have a roasting pan, a 9x13-inch cake pan will do. If you don't have a cake pan of that size, a 9x13-inch-ish glass baking dish should work. If you don't have anything like that, improvise.

Pour in the water and tuck the cinnamon sticks wherever they'll fit, but make sure they're buried under apples, or they'll lose their flavor to the hot oven air. Stick the cloves into apple slices.


4. Put the pan in the oven and leave it there for about 40 minutes. Remove it after this time, but keep the oven on. The apples should have a slightly brown appearance.


Take a potato masher or similar device and smash as many apples as you can. Just try and get them into small pieces.


Put it back in the oven for - oh, 25 minutes or so.

5. Take it out again, smash it again, and return to the oven.


When you remove it a third time, it should be ready. Smash it some more, just for good measure, and you're ready to strain it! It should look like this, by the way. If there are still somewhat firm chunks of apple, it needs more time in the oven. If it's looking dry, you can add some water.


6. In batches (I did three), run it through your food mill into a large bowl. If you find yourself devoid of a food mill, your only option is a large strainer/colander/sieve and a big spoon. Scoop some of the apples into the strainer (set over a bowl, if you please, otherwise you'll be trying to salvage applesauce from your countertops), and mash it through with the spoon. Remove the cinnamon sticks and cloves as you go. A rubber spatula is not strong enough for this. Just keep mashing, scraping, pushing, and muscling through until all that's left in the strainer is a pile of skins.


Repeat with the remaining portions of applesauce until you have your skins in one place:


...and your sauce in a bowl.


At this point, what you do with the sauce is up to you. I freeze some, refrigerate some, and eat some. I like it just as it is, sometimes with a little vanilla ice cream. Some people put it on stuff. Maybe it's good mixed into oatmeal (but I don't know, so don't blame me if it's not). It is certainly worth the trouble to make, though, particularly if you are able to score free apples.


I'm sure there's something interesting you can do with the skins, but I just like to eat them. Why not? They're toothsome and spiced and taste like apples. The cinnamon sticks and cloves I plan on sticking in a small, shallow pan with water on the stove and simmering gently to keep this lovely aroma alive. Make some holiday potpourri afterward, maybe.

Happy applesaucing.

14 October 2010

Apple Crumble


Haven't done a dessert in awhile, which makes for sad times.

But I was inspired by the autumn storm we had last week, the sudden cool and cloudy weather, and... BAM! The crap-ton of apple varieties that have landed in Whole Foods. Not that it matters as to which ones I use - I'm pretty set - but all those colors, the fragrance... shiny streaks of green and red and yellow all over the produce department.

Sad times are over, my friends. You can now enjoy delicious apple crumble in the comfort of your own home.

It smells like fall, and I'm not kidding even a little.

I have grown fond of the favorite apple pairing of America's Test Kitchen (that is, to say, for baking in fruit desserts). They always seem to use a 50/50 ratio of Granny Smith to McIntosh. Their reasoning, and I agree, is that the grannies hold their shape and provide the appley tartness that is so agreeable in baked apples, and the macs break down into this thick appley filling base and add unmatchably appley perfume and flavor. A good McIntosh apple is round, has a shiny skin (that is green and red in patches or smudged streaks) that "pops" when you bite into it, flesh that is soft (but never mealy) and succulent and green-tinted white with the occasional streak of red. If you were presented with one apple from each variety found in your grocery store (mac among them), blindfolded, and given an apple "smell test," you should be able to unquestionably pick out the McIntosh in the group by its most enticing fragrance. Go. Try. This. Now.

Note that you can use whatever kind of apples you want. You can use one kind, or seven kinds, or any amount in between. As long as you have the right amount of apple, you're probably going to be OK.

The recipe for apple crisp in my Baking Illustrated book influenced the recipe I came up with, but mine is by no means a copy of it. I haven't even tried their recipe, actually, but in true America's Test Kitchen style, in making it "the best" apple crisp, they also made the process kind of involved. More than is necessary. I can see how that would be warranted in making cake (I swear by their cake recipes, by the way), but this is apple crisp... peasant food.

Anybody should be able to make it, and not be discouraged, and see how simple and beautiful and wonderful it is. For me, this is a close-your-eyes-and-be-a-child-eating-dessert-that-mom-made-while-watching-colorful-leaves-fall-outside kind of food. It reminds me of simple times, a warm home, a cooking mother, and quiet. Not dead-silence quiet, though... The kind of quiet in which the breeze outside can be heard by the whispering of dry leaves and murmuring of cedar boughs, and the tiniest raindrops falling delicately on the roof and massaging your mind. The kind of quiet that means you're safe.

It occurs to me that maybe, to you, that kind of feeling is invoked by the odor of Kraft Macaroni 'n' Cheese from a box, glopping away on the stove like some kind of top-secret government chemical that's going to turn you into the Joker when you fall in/eat it. And hey, that's OK, but it doesn't mean you can't enjoy apple crumble. It only means that I will not be indulging your particular affliction on my blog. For what it's worth, I don't even know if my mother ever made apple crumble when I was a kid, but I know we had homemade apple pie, and the flavors are similar.


APPLE CRUMBLE
3/4 cup walnuts or pecans, chopped finely
1/2 cup packed brown sugar
1/3 cup rolled oats
1/3 cup flour
1/2 tsp cinnamon
1/4 tsp freshly grated nutmeg
1/4 tsp salt
6 tbsp (3/4 stick) cold unsalted butter, cut into cubes

1/4 cup sugar
1/2 tsp ground ginger
3 largish Granny Smith apples (or whatever kind you want)
4 medium McIntosh apples (or whatever kind you want; total weight of all varieties of apples should be about 3lbs)
1 tbsp lemon juice


1. Start by making the crumble topping. Make sure your nuts are chopped prior to mixing them with other things (should be obvious, but you never know, these days). I use the food processor because it's very fast and easy, but if you don't have one, you can definitely chop them by hand. They should be pretty fine, but some larger chunks are OK - it's really up to you.


Mix the nuts, brown sugar, oats, flour, cinnamon, nutmeg, and salt in a medium bowl. Mix it up good. Don't worry if your brown sugar is a little clumpy; some pea-sized sugar clumps will only enhance the crumble experience.


2. Your butter can be cut into whatever small size you want, as long as it's under 3/4". I generally go with 1/2". Make sure it's cold, or you'll get a mushy topping.


Using a pastry blender (see tool above in bowl) or a fork, cut the butter into the dry mixture. "Cutting" the butter into a mixture means you toss it in, and press down on it with your pastry blender or fork and stir it around to break it into smaller pieces and mix it into the dry stuff. Your end goal is a clumpy mixture, NOT a homogenous mush. It should look much like this, when you're done:


There will still be pieces of butter in there, but they should be small. When it's satisfactorily clumpy, stick it in the fridge so it doesn't soften up.

3. Preheat the oven to 375°F. Prepare for the filling by mixing the sugar and ginger in a wee bowl. You want it to be evenly distributed over the apples, so mixing it first works well.

4. Now you can make the filling. This is by far the most time-consuming work of this dish, or really any apple pie-type baked dish. All of your apples should be cored, cut into eighths (top-to-bottom slices), peeled, and each eighth cut in half. I don't recommend using a corer/slicer tool, because it makes the slices too fat. You'd have to cut them each in half lengthwise, and I think it would take you even more time (unless you can find one that cuts into eight slices). Start by scooping out the top and bottom of the apple (removing the stem and the flower end). I do this by carving them out in a cone shape (thank you, Jacques Pépin!), but you can do it however you want.


Then cut the apple in half down the middle, and do the same with the core: scoop it out of each half. I also do this by carving out a cone.


Cut each half in half, and then each quarter in half, so you get eight identical slices. Peel them (this should go pretty fast) and then cut them in half so you get two chunks.


If you have both Granny Smith and McIntosh to work with, I recommend starting with the grannies for two reasons. One, they don't turn brown as fast once they're cut. Two, they're more difficult to cut and peel, and you should always get the tough stuff out of the way when you can. After them, macs cut and peel awfully smoothly. Like taking apart an orange. Only, with a knife and maybe a vegetable peeler.

5. Once you have all your apples cut up (it should take you about 15 minutes to do all of them), chuck them in a large bowl (you can actually do this as you go). Right away, toss them in the lemon juice.


Sprinkle the sugar/ginger mixture over the top, and stir them until all the apples are coated and the whole thing starts to look wet. Dump them all into an 8x8-inch square glass baking dish, or similar volume glass baking dish. At this point in my culinary adventure I wished for a more attractive baking dish.


But then I remembered how much fun it always is to pack up all my belongings and move from home to home, so I felt grateful that I only had one.

6. Anyway, crumble your refrigerated topping over the apples, as evenly as you can get it.


And stick it in the middle of the oven and leave it there for 45 minutes. When it's ready, the top will have browned a bit and the apples should have gotten all bubbly. And you'll start to smell it after about 30 minutes. Savor this fragrance.


Let it rest about 15 minutes before you dig in, or it will burn your mouth and run amok all over your plate.

Oh, and it's spectacular with vanilla ice cream, when it's still hot.


I really need some decorative plates to use for food photography! I mean, I like my plates, but there's no variety after awhile. I did see some pretty ones at Ross for like, $1 per plate. I might go for it.

But then again, I might have to move again some day (in fact, I sure hope I get to move again some day)...

I really liked this apple crumble. It was easy and simple and had just the right amount of everything.

And it's just perfect for making your home smell wonderful.

07 October 2010

Miso Soup


I think I have discovered my new sick soup.

I wanted to say something about my memories of Campbell's condensed chicken noodle soup from childhood sick days, but I cannot. I begin to rant. This blog is not [supposed to be] about what is wrong with the world, it is about what is right with food, and cooking, and experiments in the kitchen.

Grilled Cheesus, how I love experiments in the kitchen!

Anyway, I did have miso soup once or twice when I was in third grade, and a girl in my class brought in miso soup for show-and-tell. It sure drove my carriage. (What does that even mean?) The umami of it all. That sweetly salty pungent miso flavor. That broth. The little seaweed bits.

For whatever reason, it is only now that I embark on the quest to find the perfect miso soup. Or at least, make the perfect miso soup. OK, just make some miso soup. I took ideas from all over the Internet, ingredients carefully imported via care package from Seattle's finest Japanese market (Uwajimaya), and my obsession with fat Udon noodles. I definitely took a good look at this recipe for miso soup with udon noodles, which featured an egg poached into the soup. Hey, when you don't eat land-flesh, you might as well get your B-12 where you can, right?

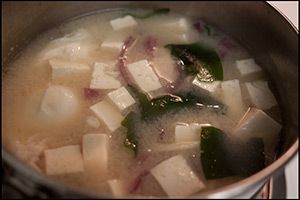
I must preface this with saying that I am not Japanese. I still don't know anything about Japanese cooking. It is also my understanding that green onions (scallions) are commonly used in miso soup. Alas, Whole Foods was not carrying green onions this week. (Really, Whole Foods?) So I used red. Very different. Still an onion. And I don't know if it's really all that common to use noodles in a miso soup - I always thought of it as tofu and seaweed and green onions in a delicious broth, but I finally found Udon noodles I like and I couldn't pass it up. As for the egg, I'd never seen that before, but I love poached eggs, and I love taking in all that good egg nutrition.

That said, this is my miso soup.


MISO SOUP
some udon noodles - however much you want to put in 4 cups of soup
couple of 3-6 inch pieces of kombu (dried kelp)
4 cups water
1/4 cup bonito flakes (these are dried flakes from a block of specially aged tuna. Mine came in little packets of about that 1/4 cup, so I used one packet)
3 tbsp miso (whatever kind you like - I used shiromiso/yellow miso)
6 oz tofu, cut into cubes
1/2 cup sliced green onions (or other onions, if you have no green)
few crumbles of wakame (a type of dried seaweed)
an egg or two


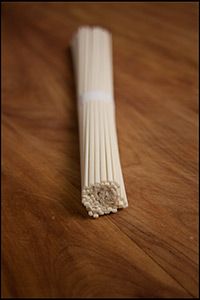
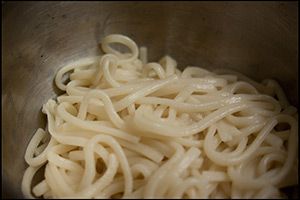
1. Cook your udon noodles according to the instructions on the package they came in. Mine took 11 minutes at a rapid boil, no salt. The brand I like is made in Australia by Hakubaku, but I cannot find it anywhere on the web. It is in a plastic-lined white paper package with a lot of Japanese characters on it, and in tiny letters at the top it says "The Kokumotsu Company" and underneath that in larger letters it says "Organic UDON" and has a drawing of a stalk of wheat. It is not the same product as this. Anyway, it's delicious, look for it in your local Asian market, in your grocery store, wherever. They get all fat and slippery when they cook. Just as they should. After they've cooked an appropriate amount of time, drain them and set them aside.


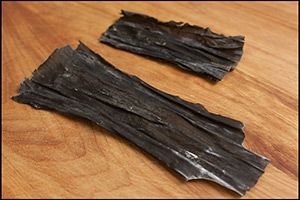
2. You can now make what's called "dashi," a kind of broth. Google it. There's a lot of info from people a lot more knowledgeable than I am. Start with some pieces of kombu. Another Asian market find. They are wide and flat and dry and brittle.


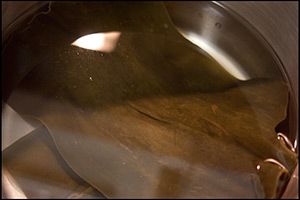
Wipe them clean with a damp cloth (I don't know why, but everyone says to do it, so I did) and put them in a pan with 4 cups of fresh, clean water. After 5-10 minutes they should rehydrate and become larger.


Put the pan on medium-high heat and sit tight nearby. It will take several minutes, but when the steam starts rising from the pan, you can take out the kombu. Set it aside, use it in something later, snack on it while you cook, make second dashi from it, whatever you feel like. But don't boil it.

3. You can now add the bonito flakes to the pan.


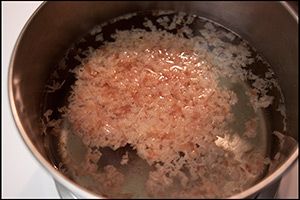
Give it a swirl to make sure they're all touching the water. Keep the pan on the heat and wait for it to come to a boil, and then take the pan off the heat. Let it sit tight for 10 minutes or so to allow the bonito to calm down and sink to the bottom.


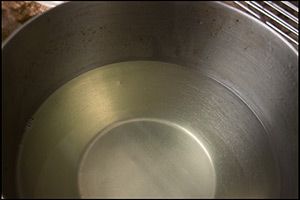
Once that happens, strain the liquid through a sieve lined with paper towel (or a paper napkin) into a bowl. You can save the bonito flakes for second dashi, or discard them.

That liquid you have? See that? Smell it?


That's your dashi. I don't know how it smells to most people, but to me it smells like Maine. I could've held my face over that bowl of dashi for a long time and been quite happy. But then I'd never eat dinner, so I decided to soldier on.

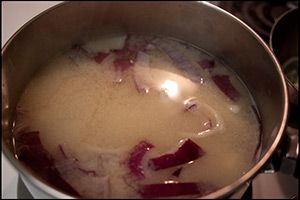
4. Return the dashi to a clean pan, on the stove, over medium-high heat. Take out a few spoonfuls - doesn't really matter how much - of the dashi and mix it in a separate bowl with your miso, until the miso is all dissolved-looking and it's pretty thick and uniform, but liquid. Keep that handy. When the dashi simmers, add however much already-cooked udon you want in your soup. Stir it to break it up if it clumped together while sitting, and let it simmer for 5 minutes. The udon and the dashi will exchange flavors, and the udon will get even fatter and slipperier.

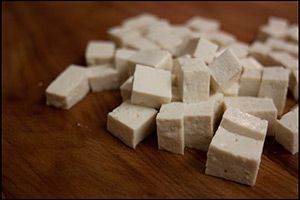
5. While the dashi simmers, you can chop your tofu. It can be firm or soft, silken or not. I used firm. It was good. I just cut it in pieces that were large enough to provide some kind of feeling on the tongue, but not so big that you'd not taste anything else.


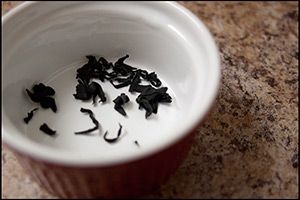
You can also hydrate your wakame. And believe me, you don't need very much. You see these crumbles?


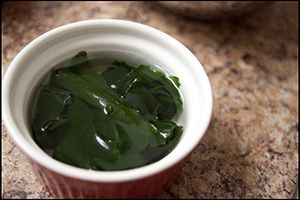
After a few minutes in water they became this.


I think that's plenty for 4 cups of soup.

6. After the udon has simmered enough in the soup, stir in the miso-dashi thick liquid, the tofu, and the onions.


Simmer all that together, over medium heat, for 3 minutes or so.

7. If you want to use an egg, now is the time to slip it in. The trick to poaching an egg without it getting messy is this. First crack it into a small bowl, make sure the yolk is intact. Check your cooking water to make sure it's not simmering too fast, or it will toss the egg around. But it does need to be simmering, or the egg will cook very slowly and just get really firm and unpleasant. Take your bowl, with your egg in it, lower it down all the way to the water, and slip it right in. Don't plunk it in, don't drop it in, don't crack it in. And once it's in, don't mess with it for a minute.

8. Cover the pan, turn down the heat to medium-low, and wait a minute to a minute and a half. Then you can peek. Lift up the egg, wherever it's hiding, with a spoon and see if the white is cooked. If not, cook it longer. If so, it's ready to eat. I left mine on an extra two minutes and it cooked too much. Boo. When the egg is cooked, carefully stir in the wakame.


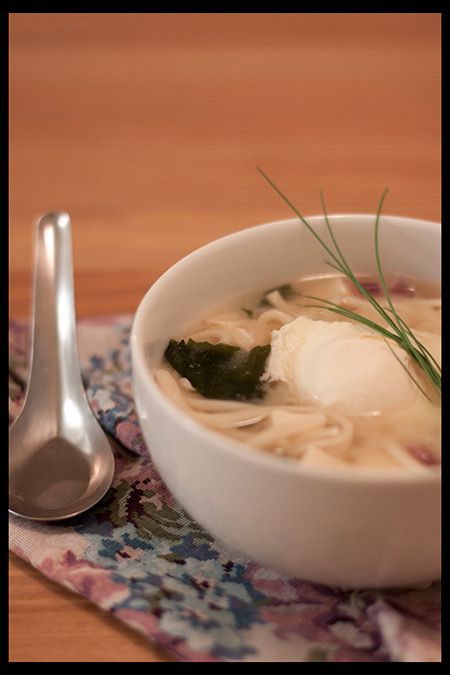
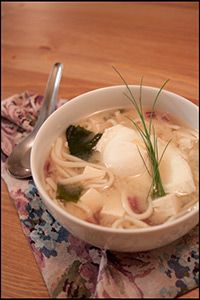
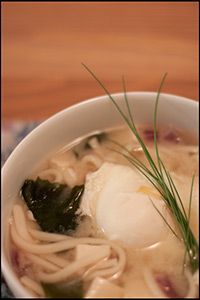
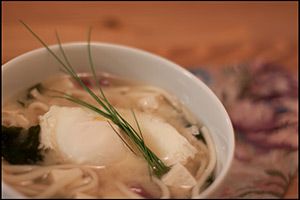
9. To serve it, just get some of everything in a bowl (don't be stingy with the broth!), and put the egg on top. If you had green onions, like I didn't, you wouldn't have to garnish with chives to make it look cute. Although you still could, I suppose.


I had trouble selecting a picture I liked, so there. Have a bunch.

My thoughts on this soup are this. Leave out the egg, use scallions instead of red onion. Noodles are fantastic, especially if you're ill and need noodle soup. The broth tastes amazing. Definitely good to make your own dashi. It doesn't take that long if you have in mind exactly what you need to do. Nothing about it is difficult. Miso is wonderful. Go get some.

In other news, I didn't do a video blog this time (obviously). It's a lot of work for so few readers. Maybe next time?