Showing posts with label seasonal. Show all posts

30 December 2010

Month o' Pies, Week 4 (part 2): Cranberry-Pecan Pie


This is the pie I didn't know I was going to make. After all, nobody expects a cranberry-pecan pie, do they?

People had all sorts of interesting and helpful suggestions as I was wracking my brain to come up with a fifth pie for pie month (yes, I know it's only the fourth, but they aren't in any particular order). Everything from Nesselrode pie to crème de menthe to chocolate pudding to the abominable cherpumple. But cranberry-pecan - it sounded so simple, yet so unique. Different from all my other pies. Thank you, Miss Amy the koala keeper, for the idea and the recipe!

I baked this pie in the middle of the night on Christmas Eve. I think that's probably why Santa never showed up. He knows when you're awake, see, and doesn't want you to glimpse him, so he skips your home. I also don't have a chimney, and I lock my doors and windows, so he'd have had a time of it anyway.

Let me just say that organic (non-GMO) corn syrup is frustratingly difficult to find. The only one I can find is by Wholesome Sweeteners, but it has vanilla in it already. I didn't really know how to adjust my recipe (which calls for vanilla) to accommodate, as I saw no instructions on the corn syrup bottle - so I just used half a teaspoon of vanilla instead of one teaspoon. It seemed to be fine.

It's actually kind of an easy pie. Or maybe I'm just settling into the piemaking groove. But there was no prebaked crust to prebake or meringue to beat or even apples to peel and slice. Just dough, some filling, and a good hot oven.


CRANBERRY-PECAN PIE
filling recipe courtesy of Steve Evans, pie extraordinaire

Crust
1 cup flour
1/2 tsp sea salt
1 1/2 tsp sugar
2 tbsp shortening
3 tbsp cold cubed butter
3-4 tbsp ice water


1. Make the dang crust. You should know how by now. Mix up the flour and salt and sugar. Then mix in the shortening really well. Then cut in the butter until it's just a little crumbly. Then fold in the water, quick as a bunny, until you can make it just come together in a ball. Less water is better, if you can get away with it.

2. Roll it out to a 12-inch circle. Put the dough in a 9-inch glass pie plate and trim the edges, fold them under, and flute.


Filling
6 oz chopped pecans
about that same volume in fresh or thawed frozen cranberries
3 eggs, beaten
1 cup dark brown sugar
1 cup corn syrup
1 tsp vanilla
1 little wee bottle of bourbon (1-2 oz)
pinch of sea salt
3 tbsp butter, melted


1. Preheat the oven to 350°F for at least 15 minutes. Meanwhile, mix up the chopped pecans and cranberries and put in the crust. It should fill it about halfway. Don't skimp on the cranberries. I wish I'd added more.


2. Whisk together the eggs, brown sugar, corn syrup, vanilla, bourbon, and salt. Just mix it until the brown sugar is more or less dissolved. It should be dark and kind of thick.


3. Drizzle in the butter, and whisk as you go. It should sort of creamify the whole thing. It'll be a little less apt to bubble thinly.


4. Slowly pour all this into the pie shell to fill in the gaps between the pecans and cranberries. It should get relatively close to the top but not spill over (if it gets too full and you still have more, bake it in a separate ramekin.


5. Stick it in the oven, and bake somewhere in the range of 45 minutes to an hour. The center should be a wee bit jiggly, but not very much and not as much as the pumpkin in the previous pie. I had it in for an hour, but I probably didn't need that much time. Anyway, you should definitely smell it.


Serve these pieces small; they're sweet. They are fantastic with brandied whipped cream (as found in the "pumpkin" pie recipe), or regular whipped cream, or vanilla ice cream.

Another successful pie, made and (mostly) consumed. I'm beginning to think I cannot fail at pie.

21 October 2010

Roasted Applesauce


I started out the week thinking I was going to be blogging about rice and beans again. Plain, old rice and beans. See blog name. Funds are low, spirits high, yada yada. I enjoy it. But then I went to a farmer's market on the Arizona State University campus in Tempe, and given a golden opportunity. One too good to pass up.

Free locally-grown blemished organic apples.

Like, FREE. So I took 5 pounds.


I believe that slightly wrinkled, a little old, somewhat banged-up apples make the best sauce. I can only hope that I prove to be as useful when I'm slightly wrinkled, a little old, and somewhat banged up.

They were a mixed variety, all grown in Willcox, AZ. As they were unmarked, I don't know exactly what they were - but it looked to me as though they were selections from their golden delicious, red delicious, and gala apples. Before you cry, "why, red delicious?? How awful!" I feel compelled to tell you that these red delicious apples in no way resemble the grown-in-Washington red delicious abomination of an apple for which my home state is unfortunately famous. They were small and round and stripy. Not tall and knobby, overly shiny and the color of ostrich meat.

One more thing, before I get to making the sauce. I must forewarn you that if you do not have a food mill and you do not wish for skins to remain in your applesauce, you are in for a workout when it comes time to strain the sauce. Don't worry, it makes your applesauce (and your triumphant victory) taste all the sweeter.

"Mightn't I just peel the apples first?" you ask naïvely. "No, good applewife (or appleman)," I tell you, "you may not." For the apple skins provide unparalleled color and flavor to your sauce as they cook, not to mention the pectin that thickens it and gives it body. If you're in it to take the easy way out, go to the 7-11 and buy a jar of lamesauce commercially-prepared applesauce, which gets all the color it needs from food coloring and all the flavor it needs from the ambiguous "natural flavors."

OK, I lied - one more thing. This was my grand experiment with making applesauce in the oven. That is, to say, roasting it. I must say, I approve of the result. One might say this is actually the recipe for...

Wait for it...

Awesomesauce? Yeah, I said it.


ROASTED APPLESAUCE

5lbs mixed apples, or McIntosh (they'd probably make the best sauce), or whatever
3 tbsp lemon juice (about 1 1/2 lemon's worth)
1/4 cup plus 1 tbsp brown sugar
5 cinnamon sticks
10 whole cloves
Pinch of sea salt
3/4 cup water


1. Preheat the oven to 375°F and start with your large amount of blemished (or simply just nice and ripe) apples. Bruises are fine. Mold and rot are not so fine. As for worms, that's your discretion. Cut out whatever you're not comfortable with. I should mention that there's sort of a formula to this recipe - for every pound of apples, you should have about 1 1/2 tsp lemon juice (I rounded up a little), 1 tbsp brown sugar, 1 cinnamon stick, two whole cloves, and 2 tbsp water (I rounded up a little). It's not an exact science, just a guideline.

So, you have your apples. Core them and cut them in eighths, like I did making the apple crumble, only do not skin them. Just leave them in eighths. For larger apples, you can cut them in 12 slices. It doesn't really matter. The bigger they are, the longer they need to cook, and vice versa. Try and make them somewhat even, though.


2. If you can find a bowl large enough for your 5lbs of cut up apples with a little room, great! I could not, however, and ended up simply with a very full bowl.


It makes it interesting, anyway, as you then have to toss the apples with the lemon juice and brown sugar. Somehow I managed.


3. Pile them all in a largish-sized roasting pan. If you don't have a roasting pan, a 9x13-inch cake pan will do. If you don't have a cake pan of that size, a 9x13-inch-ish glass baking dish should work. If you don't have anything like that, improvise.

Pour in the water and tuck the cinnamon sticks wherever they'll fit, but make sure they're buried under apples, or they'll lose their flavor to the hot oven air. Stick the cloves into apple slices.


4. Put the pan in the oven and leave it there for about 40 minutes. Remove it after this time, but keep the oven on. The apples should have a slightly brown appearance.


Take a potato masher or similar device and smash as many apples as you can. Just try and get them into small pieces.


Put it back in the oven for - oh, 25 minutes or so.

5. Take it out again, smash it again, and return to the oven.


When you remove it a third time, it should be ready. Smash it some more, just for good measure, and you're ready to strain it! It should look like this, by the way. If there are still somewhat firm chunks of apple, it needs more time in the oven. If it's looking dry, you can add some water.


6. In batches (I did three), run it through your food mill into a large bowl. If you find yourself devoid of a food mill, your only option is a large strainer/colander/sieve and a big spoon. Scoop some of the apples into the strainer (set over a bowl, if you please, otherwise you'll be trying to salvage applesauce from your countertops), and mash it through with the spoon. Remove the cinnamon sticks and cloves as you go. A rubber spatula is not strong enough for this. Just keep mashing, scraping, pushing, and muscling through until all that's left in the strainer is a pile of skins.


Repeat with the remaining portions of applesauce until you have your skins in one place:


...and your sauce in a bowl.


At this point, what you do with the sauce is up to you. I freeze some, refrigerate some, and eat some. I like it just as it is, sometimes with a little vanilla ice cream. Some people put it on stuff. Maybe it's good mixed into oatmeal (but I don't know, so don't blame me if it's not). It is certainly worth the trouble to make, though, particularly if you are able to score free apples.


I'm sure there's something interesting you can do with the skins, but I just like to eat them. Why not? They're toothsome and spiced and taste like apples. The cinnamon sticks and cloves I plan on sticking in a small, shallow pan with water on the stove and simmering gently to keep this lovely aroma alive. Make some holiday potpourri afterward, maybe.

Happy applesaucing.

14 October 2010

Apple Crumble


Haven't done a dessert in awhile, which makes for sad times.

But I was inspired by the autumn storm we had last week, the sudden cool and cloudy weather, and... BAM! The crap-ton of apple varieties that have landed in Whole Foods. Not that it matters as to which ones I use - I'm pretty set - but all those colors, the fragrance... shiny streaks of green and red and yellow all over the produce department.

Sad times are over, my friends. You can now enjoy delicious apple crumble in the comfort of your own home.

It smells like fall, and I'm not kidding even a little.

I have grown fond of the favorite apple pairing of America's Test Kitchen (that is, to say, for baking in fruit desserts). They always seem to use a 50/50 ratio of Granny Smith to McIntosh. Their reasoning, and I agree, is that the grannies hold their shape and provide the appley tartness that is so agreeable in baked apples, and the macs break down into this thick appley filling base and add unmatchably appley perfume and flavor. A good McIntosh apple is round, has a shiny skin (that is green and red in patches or smudged streaks) that "pops" when you bite into it, flesh that is soft (but never mealy) and succulent and green-tinted white with the occasional streak of red. If you were presented with one apple from each variety found in your grocery store (mac among them), blindfolded, and given an apple "smell test," you should be able to unquestionably pick out the McIntosh in the group by its most enticing fragrance. Go. Try. This. Now.

Note that you can use whatever kind of apples you want. You can use one kind, or seven kinds, or any amount in between. As long as you have the right amount of apple, you're probably going to be OK.

The recipe for apple crisp in my Baking Illustrated book influenced the recipe I came up with, but mine is by no means a copy of it. I haven't even tried their recipe, actually, but in true America's Test Kitchen style, in making it "the best" apple crisp, they also made the process kind of involved. More than is necessary. I can see how that would be warranted in making cake (I swear by their cake recipes, by the way), but this is apple crisp... peasant food.

Anybody should be able to make it, and not be discouraged, and see how simple and beautiful and wonderful it is. For me, this is a close-your-eyes-and-be-a-child-eating-dessert-that-mom-made-while-watching-colorful-leaves-fall-outside kind of food. It reminds me of simple times, a warm home, a cooking mother, and quiet. Not dead-silence quiet, though... The kind of quiet in which the breeze outside can be heard by the whispering of dry leaves and murmuring of cedar boughs, and the tiniest raindrops falling delicately on the roof and massaging your mind. The kind of quiet that means you're safe.

It occurs to me that maybe, to you, that kind of feeling is invoked by the odor of Kraft Macaroni 'n' Cheese from a box, glopping away on the stove like some kind of top-secret government chemical that's going to turn you into the Joker when you fall in/eat it. And hey, that's OK, but it doesn't mean you can't enjoy apple crumble. It only means that I will not be indulging your particular affliction on my blog. For what it's worth, I don't even know if my mother ever made apple crumble when I was a kid, but I know we had homemade apple pie, and the flavors are similar.


APPLE CRUMBLE

3/4 cup walnuts or pecans, chopped finely
1/2 cup packed brown sugar
1/3 cup rolled oats
1/3 cup flour
1/2 tsp cinnamon
1/4 tsp freshly grated nutmeg
1/4 tsp salt
6 tbsp (3/4 stick) cold unsalted butter, cut into cubes

1/4 cup sugar
1/2 tsp ground ginger
3 largish Granny Smith apples (or whatever kind you want)
4 medium McIntosh apples (or whatever kind you want; total weight of all varieties of apples should be about 3lbs)
1 tbsp lemon juice


1. Start by making the crumble topping. Make sure your nuts are chopped prior to mixing them with other things (should be obvious, but you never know, these days). I use the food processor because it's very fast and easy, but if you don't have one, you can definitely chop them by hand. They should be pretty fine, but some larger chunks are OK - it's really up to you.


Mix the nuts, brown sugar, oats, flour, cinnamon, nutmeg, and salt in a medium bowl. Mix it up good. Don't worry if your brown sugar is a little clumpy; some pea-sized sugar clumps will only enhance the crumble experience.


2. Your butter can be cut into whatever small size you want, as long as it's under 3/4". I generally go with 1/2". Make sure it's cold, or you'll get a mushy topping.


Using a pastry blender (see tool above in bowl) or a fork, cut the butter into the dry mixture. "Cutting" the butter into a mixture means you toss it in, and press down on it with your pastry blender or fork and stir it around to break it into smaller pieces and mix it into the dry stuff. Your end goal is a clumpy mixture, NOT a homogenous mush. It should look much like this, when you're done:


There will still be pieces of butter in there, but they should be small. When it's satisfactorily clumpy, stick it in the fridge so it doesn't soften up.

3. Preheat the oven to 375°F. Prepare for the filling by mixing the sugar and ginger in a wee bowl. You want it to be evenly distributed over the apples, so mixing it first works well.

4. Now you can make the filling. This is by far the most time-consuming work of this dish, or really any apple pie-type baked dish. All of your apples should be cored, cut into eighths (top-to-bottom slices), peeled, and each eighth cut in half. I don't recommend using a corer/slicer tool, because it makes the slices too fat. You'd have to cut them each in half lengthwise, and I think it would take you even more time (unless you can find one that cuts into eight slices). Start by scooping out the top and bottom of the apple (removing the stem and the flower end). I do this by carving them out in a cone shape (thank you, Jacques Pépin!), but you can do it however you want.


Then cut the apple in half down the middle, and do the same with the core: scoop it out of each half. I also do this by carving out a cone.


Cut each half in half, and then each quarter in half, so you get eight identical slices. Peel them (this should go pretty fast) and then cut them in half so you get two chunks.


If you have both Granny Smith and McIntosh to work with, I recommend starting with the grannies for two reasons. One, they don't turn brown as fast once they're cut. Two, they're more difficult to cut and peel, and you should always get the tough stuff out of the way when you can. After them, macs cut and peel awfully smoothly. Like taking apart an orange. Only, with a knife and maybe a vegetable peeler.

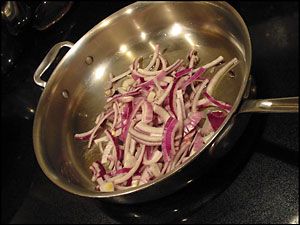
5. Once you have all your apples cut up (it should take you about 15 minutes to do all of them), chuck them in a large bowl (you can actually do this as you go). Right away, toss them in the lemon juice.


Sprinkle the sugar/ginger mixture over the top, and stir them until all the apples are coated and the whole thing starts to look wet. Dump them all into an 8x8-inch square glass baking dish, or similar volume glass baking dish. At this point in my culinary adventure I wished for a more attractive baking dish.


But then I remembered how much fun it always is to pack up all my belongings and move from home to home, so I felt grateful that I only had one.

6. Anyway, crumble your refrigerated topping over the apples, as evenly as you can get it.


And stick it in the middle of the oven and leave it there for 45 minutes. When it's ready, the top will have browned a bit and the apples should have gotten all bubbly. And you'll start to smell it after about 30 minutes. Savor this fragrance.


Let it rest about 15 minutes before you dig in, or it will burn your mouth and run amok all over your plate.

Oh, and it's spectacular with vanilla ice cream, when it's still hot.


I really need some decorative plates to use for food photography! I mean, I like my plates, but there's no variety after awhile. I did see some pretty ones at Ross for like, $1 per plate. I might go for it.

But then again, I might have to move again some day (in fact, I sure hope I get to move again some day)...

I really liked this apple crumble. It was easy and simple and had just the right amount of everything.

And it's just perfect for making your home smell wonderful.

25 March 2008

Equinox Eggs


Another vernal equinox has come and gone, and the days are now longer than the nights. Here in the north, anyway. Mum and I dyed eggs... and this year, we did some experimenting with natural colors. Last year we used those little bottles of natural dye like "black currant juice concentrate" and "blueberry concentrate" and such. It merely stained our hands and kept our brown eggs brown, so... this year we did something different.

We got some tips out of The Joy of Cooking. We started with a pot of 3 cups red onion skins in a 3 cup mixture of canned red beet juice and water with 2 tbsp vinegar, brought to a boil and turned down to simmer for half an hour. We hoped this would make red.


We did the same with red cabbage in 3 cups of water plus 2 tbsp vinegar, to make blue:


...and spinach, etc. to make green:


...and we hard-boiled a dozen eggs according to the Cook's Illustrated method of covering them with an inch of water, bringing them to a boil, removing from the heat and covering the pan and letting them sit for 10 minutes, then putting them right into ice water to chill. It doesn't overboil them, which is nice.

The cabbage made a lovely deep purply blue color...


...and the onion skins/beet juice made a brick red liquid...


...and the spinach...


...made pond-water yellow. We strained the liquid into large mugs to dye the eggs in. We got about two cups of liquid for each... fits about two eggs comfortably. So we dropped in the eggs and let them sit in there for about 45 minutes... or something like that, anyway, and they came out looking gawgeous. We tied rubber bands around some of them to make pretty stripes. We'll definitely do this again in the future. Maybe not the spinach, though, since the eggs only got their natural spots accentuated. The blue eggs came out really cool, though. I love dying brown eggs.


31 December 2007

Christmas Quiche


What's a vegetarian to do for Christmas dinner when her family is eating ham and turkey? Well, bring something even better. Better and more colorful.

OK, so this quiche probably wouldn't win any awards. I've never made quiche before and although it's not difficult, I wasn't really sure what I was going for. So I blindly groped my way around a recipe that I concocted (inspired by Mollie Katzen and Cook's Illustrated) encrusted in a recipe from Gluten-Free Girl. I got something tasty. Tasty enough to try again... some day. It certainly was pretty, anyway.

CHRISTMAS QUICHE
1 single-crust recipe from Gluten-Free Girl (but replace cinnamon with half as much dry mustard powder)
olive oil
2 cups sliced red onion
4 cloves roasted garlic, mashed
1/2 tsp salt
2 sprigs fresh thume
3 leaves fresh sage
1 tsp dry mustard
1 tbsp balsamic vinegar
1/2 cup thinly sliced green pepper
1/2 cup crumbled goat cheese
2 cups chopped Christmasy-looking red-green chard, separated stems and leaves
3 large eggs
1 cup milk
freshly ground black pepper


1. Heat a medium skillet over medium heat. Add oil and onion, and saute about 4 minutes or until the onions start to sweat.


2. Toss salt, herbs, and mustard into pan with onions. Cover the pan and turn the heat to low. Cook for 15 minutes, stirring every 3 minutes or so. Preheat the oven to 375°F.

3. Place your pie crust on a baking tray or cookie sheet. Uncover pan on stove and add vinegar, bell pepper, and chard stems. Return heat to medium and cool another 4 minutes.

4. Add chard leaves, stir and cook one more minute and remove from heat.

5. Sprinkle goat cheese onto crust. Top with sauteed vegetables.


6. Whisk eggs and milk in a 4-cup liquid measure and season with black pepper. Pour into crust with vegetables and cheese.


7. Bake in lower section of oven for 45-50 minutes, or until custard is set. Cool 10 minutes or to room temperature, slice, and serve!


PROS: colorful, tasty, relatively healthy
CONS: crust underbaked, custard not firm enough


What I would change about this recipe: Definitely prebake the pie shell. It's a thick shell and although it's very tasty, a good 1/6th of an inch was uncooked. Also use whole milk instead of lowfat. It would probably make a difference in how much the custard sets. Add one more egg, perhaps....