Showing posts with label breakfast. Show all posts

24 November 2010

Cantacoco Smoothie


You know how sometimes, life just starts getting crazy and you can't keep up your habits? Yeah.

Actually, it pleases me when these things happen. Most of the time. After all, most of my habits only exist to prevent me from getting bored. If I know what I am going to do at any given time, I don't have to wonder about what I'm going to do at any given time. But... sometimes something neat happens, and it prevents me from completing my habitual activities. For a whole two and a half weeks I was unable to a) run in circles every other day, b) blog midweek, c) pine about missing my cats and my friends 24 hours a day. I went home to Seattle for awhile, and came back with the two sweet kitties whom I've been missing more than anything else.

None of this is relevant to my post, of course, save the part about being unable to blog midweek for awhile. I meant to, at one point. I made a delightful red kale and golden beet salad, but I never actually got around to typing up a post. Such is life.

So now that life is settling down, I bring you a smoothie. Because I am a fan of fruit, and you should be too.

Oh! And it's evil, I mustn't forget to mention. (My goal for the week, you see, is to use my powers for evil.) Clearly it's evil, as none of my ingredients were sourced even a little bit locally. Well, I guess the cantaloupe comes from Mexico, and I am closer to Mexico than I used to be. But honestly - it's not even the same country. None of them are from the same country as me, none are from the same country as each other, and none of them are in season. HA! How's that for evil?

(Please, though - somebody, stop me from coming up with all these ridiculous names for things.)


CANTACOCO SMOOTHIE

fresh young coconut (they look like... well, see below)
small-medium ripe banana
1/4 small-medium cantaloupe


This (above) is what a fresh young coconut looks like. The white part is just a fibrous cover over the round coconut (like the ones you may be used to seeing), and it was taken out of a big green thing, which you probably will never see. Fresh young coconuts are full to the brim with clear liquid, which tastes like cool, sweet, refreshing water. The flesh is white, and soft and a little jellylike - unlike that of mature coconuts (the round ones with the brown hairy husk). Most of the ones you find in stores are from Thailand, and mine was no exception. They are at Asian markets and some natural food stores, and perhaps normal grocery stores, but I wouldn't know.

1. Get into your coconut. Take a sharp, large knife (I prefer to use a standard-sized chef's knife) and shave the fibrous part off the top of the coconut. You'll have to go around shaving bits off in a circle, but it should take you about 30 seconds total.


2. Hold the coconut in one hand, and take your knife in the other and tap the sharp heel of your knife (hard) all around the top of the coconut in a circle.


This is not difficult, because the weight of the knife does most of the work. You don't have to grip the handle super hard or anything. But you will have to hit it kind of hard. Experiment until you get the right amount of pressure. You should hear it crack when you get in.


3. Carefully pop off the top, and there will probably be some liquid that spills out. It should be super full.


Pour this liquid through a strainer into some kind of container. It's ok if little fibers get into it. You'll never notice them. If you're super anal about that kind of thing, you can strain it through a coffee filter or paper towel.


4. You should have a coconut and a top of a coconut. Use a spoon to scrape out all the flesh into another container. This is easy peasy. When you're done, take care to remove the hard bits of shell that may be clinging to some of the white flesh. A little bit of brown stuck to it is fine, but no hard bits.


5. YAY! You are done with that bit. Now you can cut up a cantaloupe quarter, as shown.


Remove the seeds from the center, and then cut once down the middle (like you were cutting it into two long slices, but don't go through the rind), and slice it many times across, then run the knife around underneath everything. Ta da! Another 30 seconds.

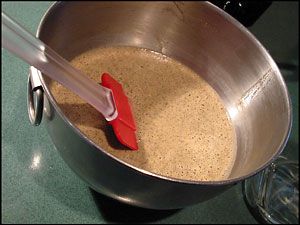
6. Put all the coconut flesh, half the coconut water, the cantaloupe, and a sliced up banana into a blender. Or, if you don't have a blender but have a wand blender, into a bowl.


I wasn't sure if I wanted the whole banana or the whole quarter cantaloupe, so I only added half of each at first. But then after blending and tasting, I decided to add the rest. And then I blended again. You should just add it all the first time and blend once.


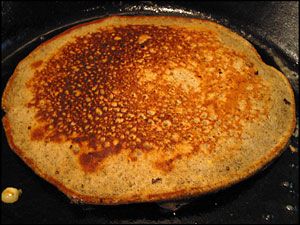
It's a pretty simple breakfast smoothie. If you like, you can add some plain yogurt to it. I like it as is. It's not as thick as some smoothies, but I don't care. If you want it thicker, and colder, you can pre-cut and freeze the cantaloupe and banana ahead of time and blend them frozen into it. But whatever you do, don't add ice.


I like this smoothie, (and other smoothies using the same model), because it doesn't taste like watered-down under-ripe fruit. It tastes strong. Strong and good.

Speaking of strong fruit, maybe some day I'll make a smoothie with durian. If you haven't had durian, be sure to try it. Another Asian market find... just make sure you don't open it in a less-than-well-ventilated area. Outside is best.

Enjoy your exotic fruiting.

22 September 2010

West Coast Grits


You may be wondering what the bloody hell I think I'm doing, going up on YouTube like this. It's a grand experiment. An experiment to find out a) whether video additions to blog posts make any sort of useful contribution; b) whether it's worth the extra trouble; and c) how much can I possibly detract from my content with my grating personality? You decide.

Except that ultimately, I decide.

Phase 1 of this experiment has shown me that I talk funny, have extremely beefy arms, and a really wicked farmer's tan (which, by the way, is not entirely my fault; it's a product of the Arizona desert sun, the fact that I spent the whole month of August under it raking hoofstock poop, and the t-shirts supplied to us by the zoo). I think it might work.

Anyway, grits. I love 'em. Nobody else I know eats them (or has even tried them, for all I know). What I call "grits" could also be considered polenta. Actually, I prepare polenta in the style of grits, if that makes sense. Polenta and grits are technically the same product, only grits are made with corn treated with lye (aka "hominy"), and polenta is just plain corn. It's basically a very coarse cornmeal. I like Bob's Red Mill brand.

Why call them "west coast" grits? Because people on the west coast like untreated food (no lye) and vegetables more than they like purified fat and starch. And people on the west coast generally don't eat traditional grits. I guess there's not a lot of creativity that went into that name.

Just an FYI. Upon re-evaluating my food budget this last month, I have come to the realization that I am spending about three times more on groceries since I moved down to Arizona. Granted, there were two-three days per week that someone else was buying my food back in Washington, but that's not even half a week. Three times more money is insanity. So I've reduced my budget (again), which means just one thing, people. I'm going to have to get creative with cheap food. Be prepared for a lot of variations on... well, rice, and beans. And cornmeal. Ideas are welcome.

(By the way, did you know that a dozen large organic eggs are like, $5-6 here? They're $3.50 in Washington. Anyone in the Phoenix area have chickens that produce more eggs than you can use? I'll pay you $3.50 a dozen for them.)


WEST COAST GRITS

3/4 - 1 cup water
1/8 - 1/4 tsp salt
1/4 cup frozen chopped spinach
1/4 cup frozen corn kernels and/or frozen peas
1/4 cup grits or polenta (not pre-prepared. the stuff that looks like coarse cornmeal)
1 large egg
Freshly ground black pepper
Lime crème fraîche (optional)


1. Put the water in a pan, with the salt, over high heat, and cover to bring to a simmer. I know, this is difficult.


When the water simmers, you can turn down the heat to medium-low or low, and add the vegetables. Wait for it to simmer again, if it stops (because frozen vegetables are cold, believe it or not), then add the grits and stir.


2. Stir it every few minutes for about 5-7 minutes, until the grits swell up and take up a lot of space in the pan, and you don't see much water. If you don't stir it, the water comes up to the top and the rest of the stuff in the pan sticks to the bottom.


When most of the water is absorbed, you can add the egg. You don't have to pre-beat it, just crack it into the pan and stir it around. When you see the gelatinous clear part (the "white" of the egg) make lots of white streaks in the grits, and it takes on a smoother, more creamy consistency, it's probably ready! It depends on the amount of heat you have on it. Add your pepper, and you're done.


Unless you have lime crème fraîche to drizzle on the top. That makes it even better. A stroke of genius, that was.


So, I'm undecided on the video. It is a little unnecessary, right? I suppose this might not be the best recipe on which to try the video, as there is no real "technique" to show. I mean, boil water and put stuff in a pan and stir it. There's really nothing easier. Opinions are welcome...

Oh, and this is super cheap, super easy eats. Breakfast, lunch, or dinner. One of my fallbacks when I can't decide what to make, or if I hardly have anything to fix. I always have some grits around (I keep grits in a jar in the freezer, so they don't spoil). You can make it with cheese instead of eggs, but it has fewer nutrients and more fat, so... depends on what you're looking for.


Aaand.... discuss.

02 January 2008

Buckwheat-Corn Pancakes, part II


I've been working on this recipe for the past few months and I'm pretty happy with it so far. Better than the first version, certainly. The only catch is that I don't ever seem to have buttermilk on hand when I'm making it, so I've been using various combination of sour cream, milk, and/or lemon juice instead. I think buttermilk would be better. But I don't know until someone tries it and tells me.

These substantial, down-on-the-farm pancakes develop a sweet, crispy exterior while maintaining a moist and fluffy interior. The molasses adds a layer of earthy sweetness that is well-balanced by the more delicate flavor of honey.

BUCKWHEAT-CORN PANCAKES (part II)
2/3 cup buckwheat flour
1/4 cup corn flour
2 tbsp cornmeal
1 tsp baking powder
1/2 tsp baking soda
1/2 tsp salt
1 large egg, separated
1 cup buttermilk
2 tbsp butter
2 tbsp honey
1 tbsp full-flavored molasses (not blackstrap)
1/2 cup blueberries, fresh corn kernels, or other topping/filling of your choice


1. Whisk or sift together the dry ingredients (flours, leavening and salt) in a large bowl. It's helpful to sift if you have clumpy baking powder, because then, you know... it gets distributed and all. Just a thought.

2. Whisk egg white with buttermilk in a 2-cup liquid measure and bring to room temperature by partially submerging in a bowl of warm water and stirring periodically. If you have cold ingredients, it will coagulate the melted butter, which sucks a lot. You don't want clumps of butter here. It's not a pie crust, you know.

3. Reserve yolk in a small bowl while melting butter in a small saucepan or double boiler. Add honey as butter is nearly melted. Slowly drizzle melted butter and honey over the yolk, whisking constantly to avoid cooking the yolk. Stir in the molasses.

4. Add yolk mixture to buttermilk and whisk to combine well. Pour into large bowl with dry ingredients, and whisk until most of the flour is moistened but it's still a little lumpy. If you over-mix it, the bubbles created by the baking soda and powder will collapse and die like the fragile little creatures they are. Then you'll get really flat, dense pancakes. So be gentle.


5. Let batter rest for a few minutes while you preheat a heavy skillet over medium heat. I love cast iron for pancakes, it creates an unbeatable crust. Stainless doesn't really cut it, and I never recommend cooking in a nonstick pan, but that's just me. Use what you have.


6. Test the heat of your skillet by adding a pat of butter. If it foams but does not readily brown, the skillet is the proper temperature. If it browns quickly, it's too hot. If it slowly melts, it's not hot enough. Adjust! When it's just right, ladle or scrape some batter (it will be nice and thiiiick) onto the hot, buttered skillet. Spread it out some, or you'll get a lump rather than a pancake. Sprinkle your blueberries or corn on top. Whatever you want, really.


7. After the edges start to set and large bubbles appear in the middle of the batter, it's ready for flipping. This is fun. Flip it now. But try not to mess it up. Because half-cooked pancakes are very sensitive to this sort of activity and are prone to folding up on themselves, adhering to the sloped sides of your skillet (rather than the more desirable flat surface), or missing the pan altogether. This is not good.

8. Cook until bottom is crispy and brown, and then set aside on a rack to cool or keep warm in a 200°F oven while you cook the other pancakes. Add butter to the skillet before cooking each pancake, or they'll stick and won't get as crusty and beautiful. Don't stack them until they're ready to eat, or they'll get all soggy. Ew. Serve with butter, maple syrup, extra blueberries, or whatever you have that you think goes well with buckwheat pancakes.


PROS: sooo fluffy and delicious. Crispy on the outside and soft on the inside. Hearty yet light.
CONS: batter is so thick it can be difficult to work with. I don't really care, though.


PS: I got a new camera for Christmas! Woohoo! This is my first blog using my new Sony Cybershot DSC-W80. YAY!

15 October 2007

Buckwheat and Corn Pancakes


This was a fun one.

I haven't experimented much (read: at all) with buckwheat before, but it's right up my alley. And yes, buckwheat is gluten-free - it's not wheat at all. It's not even a grass. It's a knotweed with wickedly awesome seeds.

It tastes very earthy, mild yet powerful. The pancakes were dense and filling, but not uncomfortably so. Just buckwheaty and beautiful.

I think next time I'd like to add more corn, though - the flavors really go well together, and with the ratios I tried, the buckwheat flavor all but ate up the corn flavor. I might also add more leavening (baking soda, maybe, with buttermilk instead of milk) to see if it helps the pancakes rise at all.

BUCKWHEAT AND CORN PANCAKES
3/4 cup buckwheat flour
1/4 cup corn flour
2 tbsp cornmeal
1/4 tsp salt
1 tsp baking powder
1 cup milk
1 large egg
1 tbsp vegetable oil or melted butter
2 tbsp honey (molasses is good too; just not blackstrap)
1 cup mixed fresh sweet corn and blueberries (or whatever you wanna stick in there)
butter for the pan
topping of your choice!

1. Combine the dry ingredients in a medium-large mixing bowl. Play with the ratios some (of the flours, anyway), if you like. Even a failed pancake is a good pancake (well, in most cases).

2. Warm your ingredients to room temperature. Put the egg in some warm water (not hot - it will cook), sit a measuring glass of milk in some warm water and stir it, whatever. Honey and molasses are hard to mix into cold things.

3. In small bowl (I like to use a 2-cup liquid measure to save dishes), measure out the milk and the egg, and beat until the egg is nicely broken up and no longer globby. Nobody likes a globby egg; you get big white patches in your pancakes that way.

4. Add the oil to the dry mix and whisk together until it looks good and well-coated, then pour the egg-milk in. Drizzle in the honey and whisk the batter until it looks well-incorporated. Don't overmix it though, or the baking powder will be rendered useless.


5. Let the batter rest while you heat up your skillet. I love a heavy cast-iron pan for pancakes - it gives them a nice, brown exterior. Heat to medium heat and drop in a pat of butter and spread it around to coat. It's good and ready when it bubbles and foams right away but doesn't burn and smoke.

6. Ladle, spoon, or pour some amount of batter (whatever looks good to you) on the skillet. Immediately sprinkle a small handful of corn/blueberries over the top. They'll sink right in.


7. When the edges of the pancake are set and the middle has bubbles, flip it. Do the other side until it's done. It's up to you when it's done - it takes about 2 minutes, depending on the size of your pancakes. I like 'em big.


8. Transfer to a cooling rack or the oven to keep warm, but don't stack them or they'll steam each other. Then they'll be all floppy and moist. Not crispy and wonderful.

9. Serve with butter, maple syrup, or blueberry jam... Yummmmmy!


PROS: homey, hearty, filling, healthy, tasty, great combination
CONS: not very sweet, buckwheat can be is an acquired taste, not enough corn, a little dense


This is based on the recipe from Bob's Red Mill - Down Home Buckwheat Pancakes - with several additions/substitutions. I would make these again. Maybe with some changes, but it's definitely going down in the book.