Showing posts with label cookies. Show all posts

22 July 2010

Collard-Potato Soup


Because nothing calls for a steaming hot bowl of soup like a 105 degree July evening in Arizona.

Times like this, I think I must be out-of-touch with my environment. I used to love going for ice cream during winter in Seattle. Or does that make me in-touch with my environment? Perhaps I just want to be feeling on the inside what I'm feeling on the outside. Helps with intra-body communication. Or maybe body-to-Earth communication. Either way it gets everyone on the same playing field, and I'm starting to sound like a communist, so I'm going to move on.

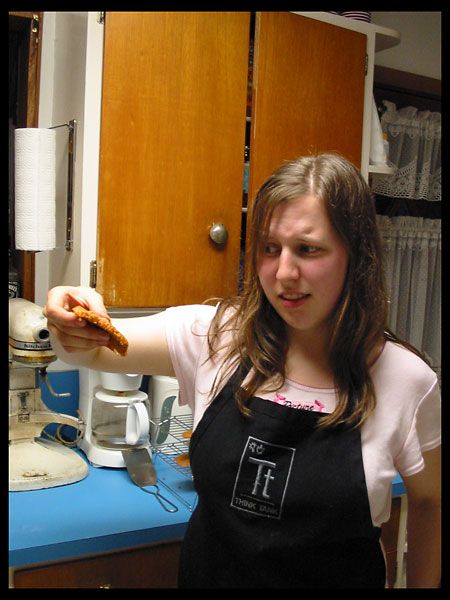
It was a stock-up-for-the-week cooking day. Earlier on, I made pinwheel cookies for the first time. I used the recipe from The New Basics Cookbook by Julee Rosso and Sheila Lukins.


They were crisp and light, but the chocolate flavor was strong. To be fair, I used vanilla extract instead of the bean like they called for, but I don't know if a bean would have mellowed out the chocolate any better. I used Dutch cocoa... maybe next time I'll use natural and see if it helps. Or add some almond extract. Or peppermint. Or orange. But no. Digression.

Supposedly I'm blogging about soup today, so here goes. This soup is so... bistro. Every time I make it, I plan my future as the owner and sole employee of a small cafe, where I serve a soup of the day, which is usually this (I think I'd sell a bowl for $4.5, and maybe a cup for $2.5), because none of my other soups are very trendy. Fortunately, this is a soup that bends as easily as your whim, so to speak. If you don't want to use collard greens, you can use broccoli. Or asparagus. Or kale. You could probably even use celery. Or carrots. Maybe even eggplant. Hmm, that would be interesting.

I have to give Robert credit for this soup, really, as it was originally mostly his idea.

Mostly.


COLLARD-POTATO SOUP


Olive oil
Sea salt
Freshly ground black pepper
1 bunch (1/2 to 1 lb) collard greens, washed and stems separated
2 cups sliced yellow onion
4 medium red potatoes, sliced thinly (4 cups, maybe?)
2 fat cloves garlic, peeled and smashed
Water
1/2 cup heavy cream
Fresh chives for garnish


1. One thing I really like to do with making a pureed soup like this is to roast at least part of the star vegetable ahead of time. It adds a hint of a charred flavor to the soup, which I like. So the first thing you should do is preheat the oven to 375°F. Cut the collard stems into sticks a few inches long and toss them with some olive oil and salt and pepper. Spread them in the bottom of a glass baking dish, which you will then put in the oven when it's preheated. Keep it there for 30 minutes while you do the rest of the soup.


2. Start your pot. You'll need a relatively large pot - not because you're making a lot of soup, but because greens start out large and get small after they cook, and you need to give them space. I used a big honkin' stockpot. Anyway, the long and short of it is that you need to slice your onions - however you want is fine - and chuck them in the pot with a little olive oil over medium heat.


You should then slice your collard leaves. This might seem like a pain, but it doesn't have to be! I stack a bunch of them together, roll them tightly, cut them once hot-dog-style right down the middle of the roll, and then slice the roll the fat way in about 1/2-inch slices. So you get a bunch of leaf pieces. It should take less than a minute to do the whole bunch. Toss them with the onions.


3. Let the onions and collards cook for several minutes so the greens can reduce, but stir them a lot so the onions don't burn on the bottom of the pot. In the meantime, you can smash your garlic and slice your potatoes!! This is so exciting. To smash garlic, keep the skin on and whack it hard coming straight down with a mostly-full bottle of olive oil. Then cut off the ends, peel (quite easily, I might add), and roughly chop. It will be simmering in water for awhile, so you don't want it too fine lest the garlic flavor cook out.


Ooh, potatoes. So all you do is slice each potato in half the long way (so you get two elongated flattish halves) and then lay the flat side down and slice thinly from the end. It goes pretty fast. The thinner you slice, the less time it takes to cook. I would go anywhere from super-duper thin to maybe 3/16 of an inch. Or just eyeball it. Or use one of those mandolin slicers. But mind your fingertips if you do use one, as they may slice off and will subsequently get lost in the potatoes and then become rubbery with cooking and ruin the texture of the soup. At this point, your greens and onions should look something like this, and start to be leaving a residue on the bottom of the pot despite your efforts.


4. This means it's time to add water. Add potatoes, add garlic, a hefty pinch of sea salt, and add enough water to just cover everything. Probably more water than I did, because I had to add more later.


Turn the heat up a bit to bring it to a simmer, and then turn it back down to keep it simmering gently and cover the pot partially with a lid on cockeyed.

5. Let the pot cook like that for 15 minutes or so, stirring every few minutes to make sure everything's getting cooked evenly. If ever you notice a lot of things poking out of the water, either add more water or push them back under. Your roasting collard stems will probably be ready around this time, so take them out of the oven. They should have gotten some nice browned edges.


Take the most even-looking half of them and cut them into very short pieces and set aside to use as garnish. The rest of them you should cut into 1-inch segments and toss into the simmering water.

6. When the potatoes are tender (take a piece out and eat it and decide if they're cooked or not), then you're in the home stretch. Everything should have mellowed out together in the pot, like so.


Take it off the heat and whip out your immersion/wand blender (that's the hand blender on a stick which is so handy in situations such as these). If you don't have one, you can use a normal blender and do it in batches, but that's a pain. Or you can use a food mill, which is also a pain. A food processor probably works too, but I have never used one for this purpose, so I don't know. An immersion blender is a good tool to have around. Put it in your pot of soup and start whirring it around. In a few minutes it should look like a comic book swamp.


This is good. Taste for seasoning, and add salt and pepper as needed.

7. The final steps are thus. Add your cream, in a drizzle (why? I don't know. because it's fun.). I didn't measure how much I put in, but it was probably about half a cup. Blend it some more, until it gets evenly pale green. Taste again, adjust as necessary. If it's really thick, don't add more cream, add more water.

8. So now you can put it in a bowl. Add some of your chopped roasted collard stems. And some chives. And then eat it. OM NOM NOM this is a really awesome soup. I mean it, it's really good. You should try it.


So, if I were changing anything about this recipe, I'd make it more often. That is all. I mean, really - it's an organic soup that contains probably 8 servings for under $10 for the whole pot. Good. Deal.


I also want to dedicate this soup, and the blog post, and the recipe, to my late great uncle Bym. I always associated this particular shade of green with him, and I thought of him when I made it. And I think maybe he would have liked it.

06 February 2008

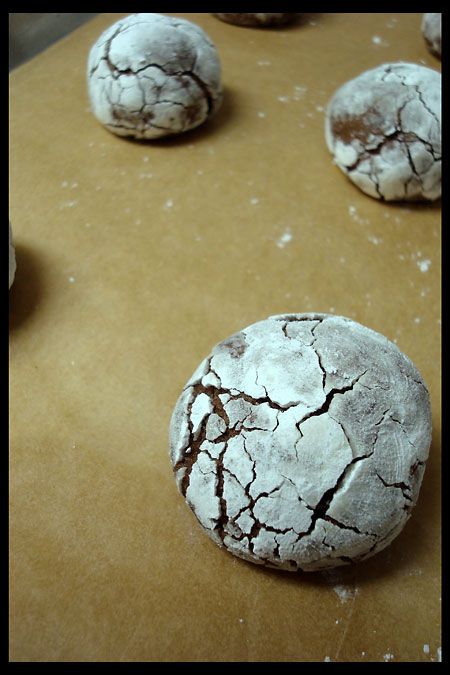
Learning Experience #3: Chocolate Crinkles


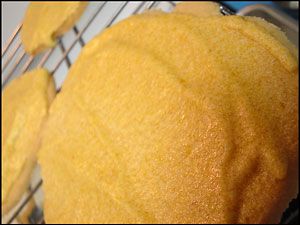
I've done it again. Except this time, instead of cyclooctane rings of overspread cookies a milimeter high, I had the opposite problem. The cookies didn't really budge...

I blame two things: too much flour, and too much xanthan gum.

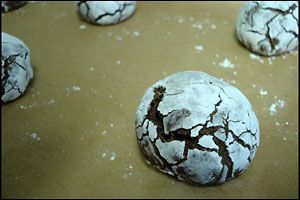
The failed. spreading cookies that I've made in the past contained very little xanthan gum, and acted as though they didn't have enough flour (very thin and brittle, more sugary than soft). So I compensated. Overly so, evidently... now I have cakey, gauzey cookies with nearly no spread whatsoever. At least they taste good.

I did make one batch of drop cookies that came out PERFECTLY... some chocolate chip cookies a couple of months ago. They spread like charms, stopped at just the right spot, were soft and chewy and melty and tasted exactly like a chocolate chip cookie should taste. I didn't blog about it because I forgot to take pictures.

Maybe that's the key, here...

Anyway, these aren't all that bad. I will make them again with the aforementioned changes to see what might happen.

CHOCOLATE CRINKLES
from The Joy of Vegan Baking by Colleen Patrick Goudreau, adapted slightly
3 tsp egg replacer powder (I used my own blend of soy flour, potato starch, baking powder, and xanthan gum)
1/4 cup water
1/2 cup sugar
2 tsp vanilla
1/4 cup hemp milk (or whatever - I can't have soy milk and rice milk is too thin)
1/4 cup Earth Balance margarine or other trans-fat-free nondairy butter
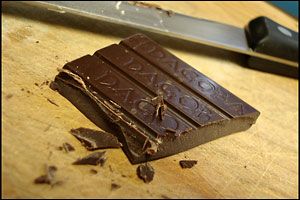
3 1/2 oz dark chocolate, chopped
1 1/2 cups gluten-free flour blend 1:2:3:3 tapioca:potato starch:sorghum:brown rice (I kind of... packed it in... don't do this)
1/4 tsp salt
1/2 tsp baking powder
1/2 cup confectioners' sugar, sifted


1. Whisk together egg replacer powder and water for about a minute, until thick and creamy. I'm guessing Ener-G powder gets thick and creamy, mine doesn't really. I'm so homemade it makes me ill. Toss in the sugar, vanilla, and hemp milk and beat another minute or so.


2. In a small saucepan over low heat, melt butter and chocolate completely. Remove immediately from stove and stir into the milk mixture.

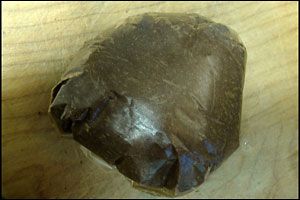
3. In a large bowl, whisk flours with salt and baking powder. Add the wet ingredients and mix slowly until all is combined. You'll get kind of a loose batter at this point because everything is still melted, but it will start to firm up soon. Plop in the center of a large rectangle of waxed paper and wrap up. Refrigerate one hour to overnight.


4. When dough is chilled, preheat the oven to 325°F. Prepare baking sheets with parchment paper.


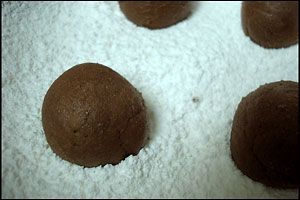
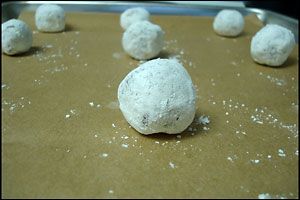
5. Sift confectioners' sugar into a small-medium bowl. Divide dough into 36 round, 1-inch balls. Round each one in your hands and toss it in the powdered sugar to coat, jiggling off the excess.


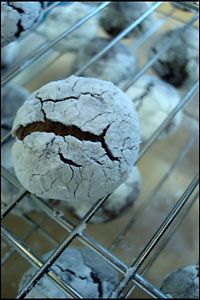
6. Line prepared dough balls on cookie sheets 2 inches apart. Bake for 18 minutes or until... you know, they're done. They won't look much different. Only a little cracked. Let cool on pans for 2 minutes, then remove to cool on racks.


PROS: chocolatey, crunchy exterior and chewy, soft interior, attractive
CONS: unspread, the *littlest* bit gummy

02 November 2007

Holiday Cut-Out Cookies


Just getting caught up here... I've made so much stuff and hardly had time to post. Seems a little bit ironic.

Anyway, these cookies turned out pretty well, given my previous experiences with gluten-free cookies. I used a recipe, too, from Land O'Lakes. But I made a few changes. Since I don't pre-mix a gluten-free flour blend, I just use specific amounts of each kind of flour.

These are cookies you should probably eat within a few days, because they will dry out quickly after that and are prone to crumbling into little pieces... but hey. They're delicious. If you like soft, sweet, frosted cut-out cookies, that is... and I know I do.

HOLIDAY CUT-OUT COOKIES
1 cup unsalted butter, softened
1 cup sugar
2 egg yolks
1 1/2 tsp vanilla
1 1/2 cups white rice flour
1/2 cup potato starch
1/4 cup tapioca starch
3/4 tsp xanthan gum
1/4 tsp salt

1. Combine flours, xanthan gum, and salt in a medium bowl or on a piece of waxed paper and set aside.

2. Cream butter and sugar in a large bowl at medium speed, scraping often (I ran out of butter so I used half butter, half non-hydrogenated shortening) until light and fluffy and beautiful. Add egg yolks and vanilla, and continue beating until well-mixed, scraping down sides of bowl as needed.

3. Reduce speed to low and add flour mix, beating until incorporated. Divide dough in half, flatten into 4-inch disks, wrap and refrigerate 1 hour.

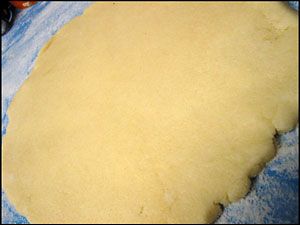
4. Preheat oven to 350°F. Generously rice-flour a work surface (if you don't have enough, the cookies will stick). Roll out one disk of dough to 1/4-inch thickness.


Using 2 1/2-inch cookie cutters of your choice, cut out pieces of dough and transfer them to an ungreased cookie sheet (add sprinkles now if you want). Place them at least 1 inch apart. This is where I goofed, and the cookies I put too close together started kissing in the oven. Sigh.


5. Bake 8-12 minutes or until edges are lightly browned (this took me 16-17 minutes in an accurate oven). Let rest 2 minutes on cookie sheets, then transfer with a metal spatula onto cooling racks. Cool completely before frosting.

6. I'd tell you what the frosting is made of... but I didn't write it down. Heavy cream, shortening, and powdered sugar... for the pumpkins I added some pumpkin puree, cinnamon, ginger, nutmeg and cloves, and for the chocolate I added melted bittersweet chocolate... But the ratios? Heck if I know. Anyway, pick a nice frosting recipe that you like (butter really is better for this, but I ran out). Frost those cookies. Decorate away. Buy one of those tubs of frosting if you really want to sacrifice all your hard work only to use canned frosting. They're your cookies... No pressure :)


PROS: so soft... and they actually hold their shape in the oven! As long as they're rolled thin enough, anyway. GREAT with frosting. If you hand them out, you'll have no trouble finishing off a batch in a couple of days.
CONS: A bit crumbly... and difficult to brown. The shape kinda gets a little muddled, but you can still tell what it is, especially if you use something like a pumpkin or a Christmas tree. Not so good for little details, though.


I made pumpkins (with pumpkin frosting), ghosts (with vanilla frosting), bats, and cats (with chocolate frosting). Sense a theme here? :)

I'll probably make a few changes next time. Like use Cook's Illustrated's "reverse creaming" method they recommend for holiday cut-out cookies. Definitely use all butter instead of half-shortening. Use a real recipe for frosting... like the vanilla and chocolate buttercream recipes from Vegan Cupcakes Take Over the World. Put them further apart on the baking sheet.

I'm so silly...

17 October 2007

Learning Experience #2: Snickerdoodles


Apparently gluten-free cookies are no easy accomplishment. Not for me, anyway.

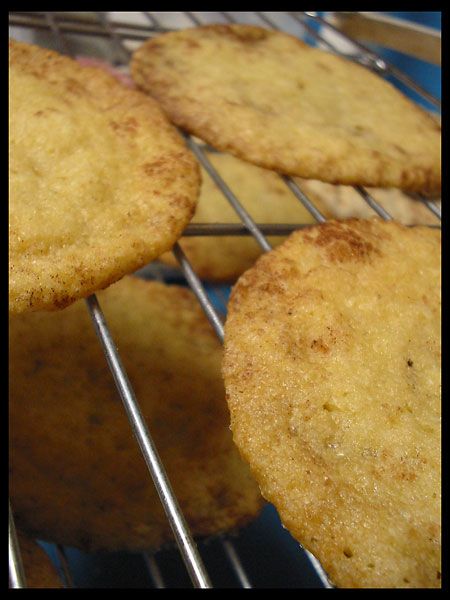
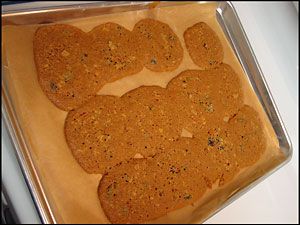
OK, so they turned out a little better than the last ones. Definitely tastier. But woah. Flat much? Very breakable, hardly workable dough, and they just plain look sad. But they are killer on ice cream...

I'm still wondering how I managed to fit them in the cookie jar.

Because when I tried to take them out, the cookies were about an inch wider than the opening. Creepy.

Let's get down to business, though, shall we? How exactly did I concoct such a... concoction?

Well, I wish I could tell you - but I wrote over my test recipe (darn) with a second version that I have yet to try. Instead, I'll walk you through the basic procedure.

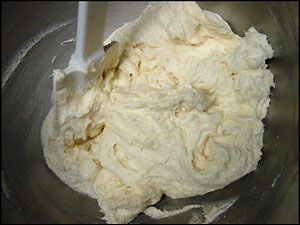
You start by creaming your fat and sugar together. It should look beautiful and white and fluffy (full of air, you know). Add your wet ingredients like eggs and vanilla and such, beat it, and add your flours and chemical leavening and salt and stuff.

So it should be all stiff and cookie-doughish, right? But it wasn't. It was sticky and soft, like butter that's been out of the refrigerator way too long.

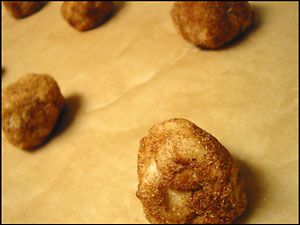
So I froze it for like, 10 minutes. I took it out and rolled it into little balls, tossed them in sugar-spice mixture that I'd made earlier, and set them on parchment paper on my cookie sheet. About 2 inches apart. Should be pleeennnty of space. This, my friends, is where everything goes wrong, so wrong.

Suffice to say that 2 inches was not enough room. These guys like to really expand. And by expand, I mean out. Not up. What I got ended up looking like crispy cyclooctane rings all strung together with their little shared carbons and their lack of personal space.

One thing I can say is that they look a lot better on screen than in person. Not that I didn't see them fit to eat, obviously. They're long since digested, actually...

For the record, I make pretty delicious "normal" snickerdoodles. I'm not just doodle-deficient or anything. But there's more to wheatlessness than meets the eye. I obviously haven't conquered the gluten-free cookie yet. But I will.

You just wait.

17 September 2007

Learning Experience #1: Carrot Raisin Drop Cookies

I consider myself a pretty good baker. Nearly all of my concoctions are edible - most are downright scrumptious - but alas, I am new to gluten-free baking. I don't know if it's my technique, or the recipe, that is off, but one thing's for sure: these cookies will probably end up as a pulverized ice cream topping. If they're lucky.

Maybe my expectations were unrealistic? Maybe gluten free cookies are supposed to look like dog vomit.

Anyway, I chose this recipe because I love carrots and sweet things, and I love raisins, and I love (nearly) anything that has pumpkin pie spice as an ingredient. OK, they don't taste that bad. But um, yeah.

CARROT RAISIN DROP COOKIES*
1 cup gluten-free flour mix (2 parts white rice flour, 2/3 part potato starch, 1/3 part tapioca starch)
1/2 cup soy flour
1 (rounded) tsp baking soda
2 tsp pumpkin pie spice (I used 3/4 tsp cinnamon, 3/4 tsp ginger, 3/8 tsp nutmeg, and 1/8 tsp cloves)
1 cup rice polish (or crushed gluten-free cereal: I used Arrowhead Mills Rice Flakes)
1/2 cup butter
3 large eggs
1 cup corn syrup
2 cups grated carrots
1 cup raisins
1/2 cup chopped walnuts

1. In a bowl, mix together flours, baking soda, spice, and rice polish.

2. In another bowl, beat butter, eggs, and Karo with an electric mixer until blended. Mix in the carrots. Add the flour mixture. Stir until mixed, then beat until blended. Stir in raisins and nuts.

3. Spoon dough in tablespoon-sized mounds 2 inches apart on greased baking sheets. Bake in preheated 350° oven until cookies feel firm when touched, 12 to 14 minutes. Remove from pans and cool.


Makes about 4 dozen cookies
*Source: The Gluten-Free Gourmet: Living Well Without Wheat by Bette Hagman

I don't get it. I tried chilling the "batter" (yes, it made batter, not dough) in the freezer before baking, but it didn't make a difference at all. I don't know the chemistry of gluten-free baking or anything, but it seems to me that the recipe would have been better using sugar or brown sugar or a combination of both (at least then it may be drier!), and maybe some vanilla (and salt... hello?!) to bring the flavor up a notch. I don't know how acidic the corn syrup is, and if that's the only thing that the baking soda is reacting with to provide lift (which in this instance, let's face it, rivaled the lift of a crepe)... but I may have added baking powder as well. Ah well. Another day, another learning experience... will have to try this again sometime. Not soon.

At least the batter tasted good.